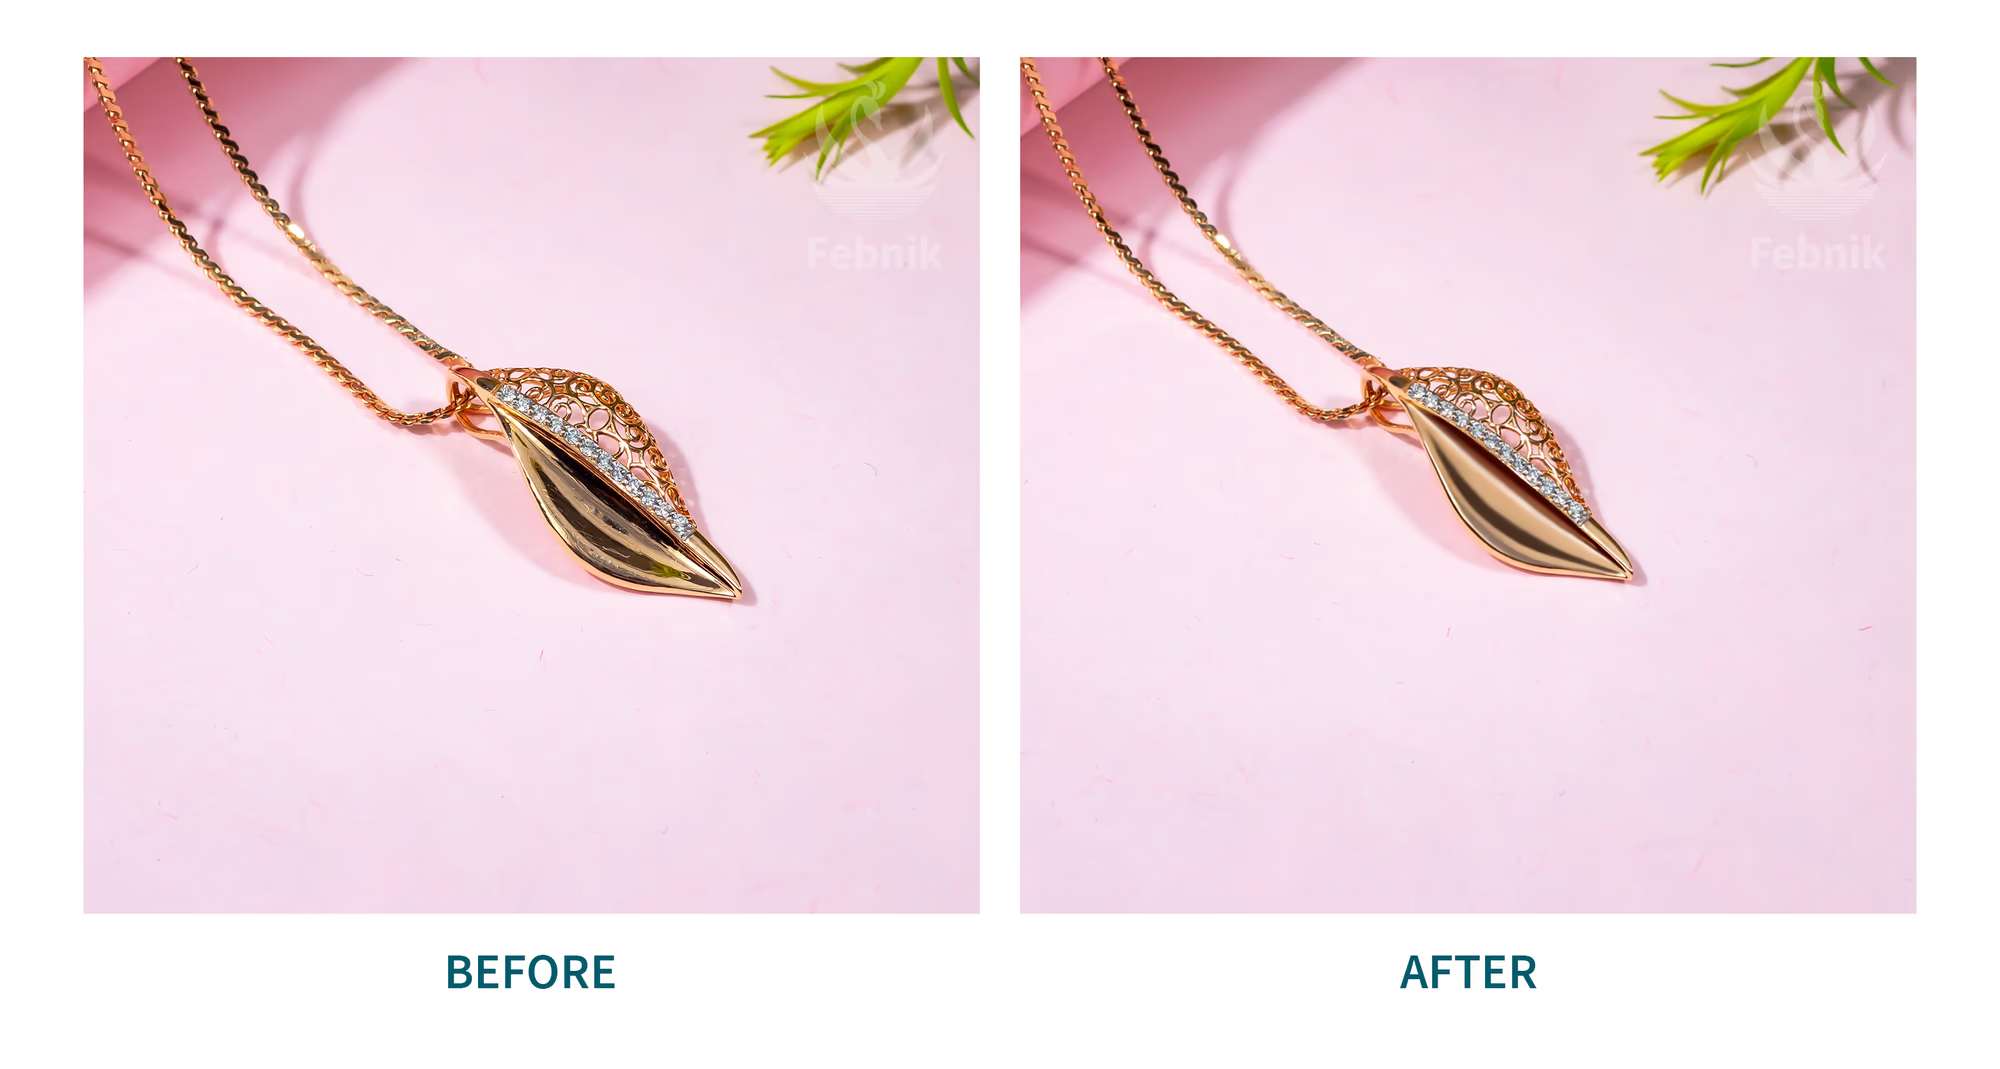
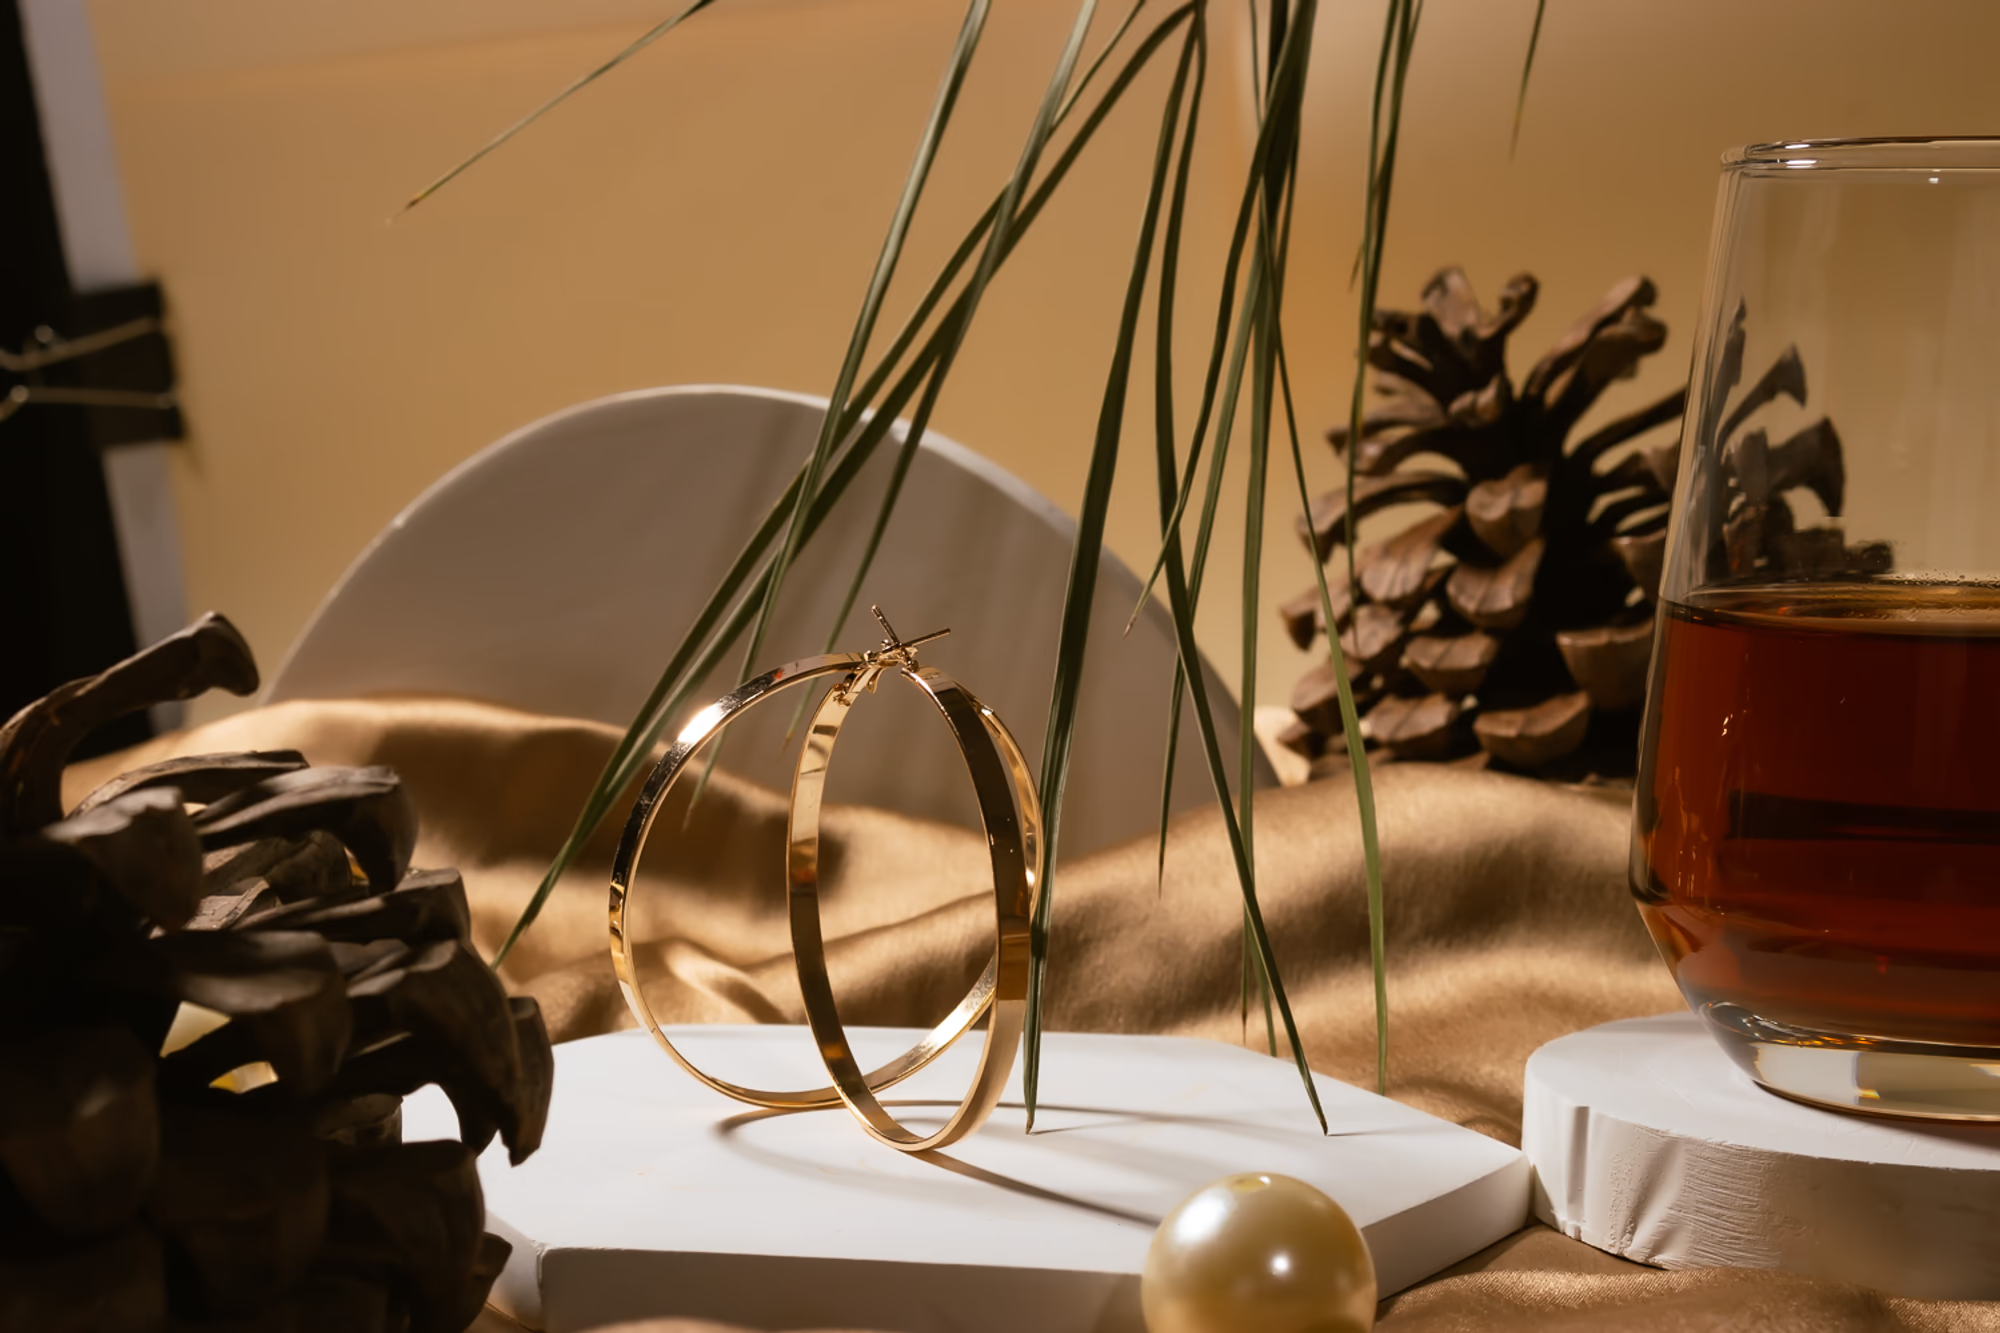
Jewellery is loved all over the world. It is not just an accessory but part of our Indian culture and tradition. It is a complex object to photograph and retouch. Hold a piece close to you, and you will see scratch marks or other imperfections. Usually, we ignore these flaws but not in photos on Online Stores and websites. They can easily discourage buyers, and it is the Job of a Retoucher to remove them to make them look flawless.
Jewellery is an intricate object. Retouching these little minions is tough. I started retouching by working on portraits and headshots. Product and Jewellery were never my forte. Retouching a product is quite similar to a person but Jewellery requires different methods.
My first edits of it never came as I expected them to. I used complex techniques to fix the issues, but the results were still off.
Finding the correct methods was difficult, but with some more editing, it became evident that simple solutions produced the best results. Finally, I can achieve the results that the brand wants.
Depending on the flaws, there are various methods using which we can remove Dust and Scratches. I will introduce them in the order of time it takes and the quality of results we can achieve.
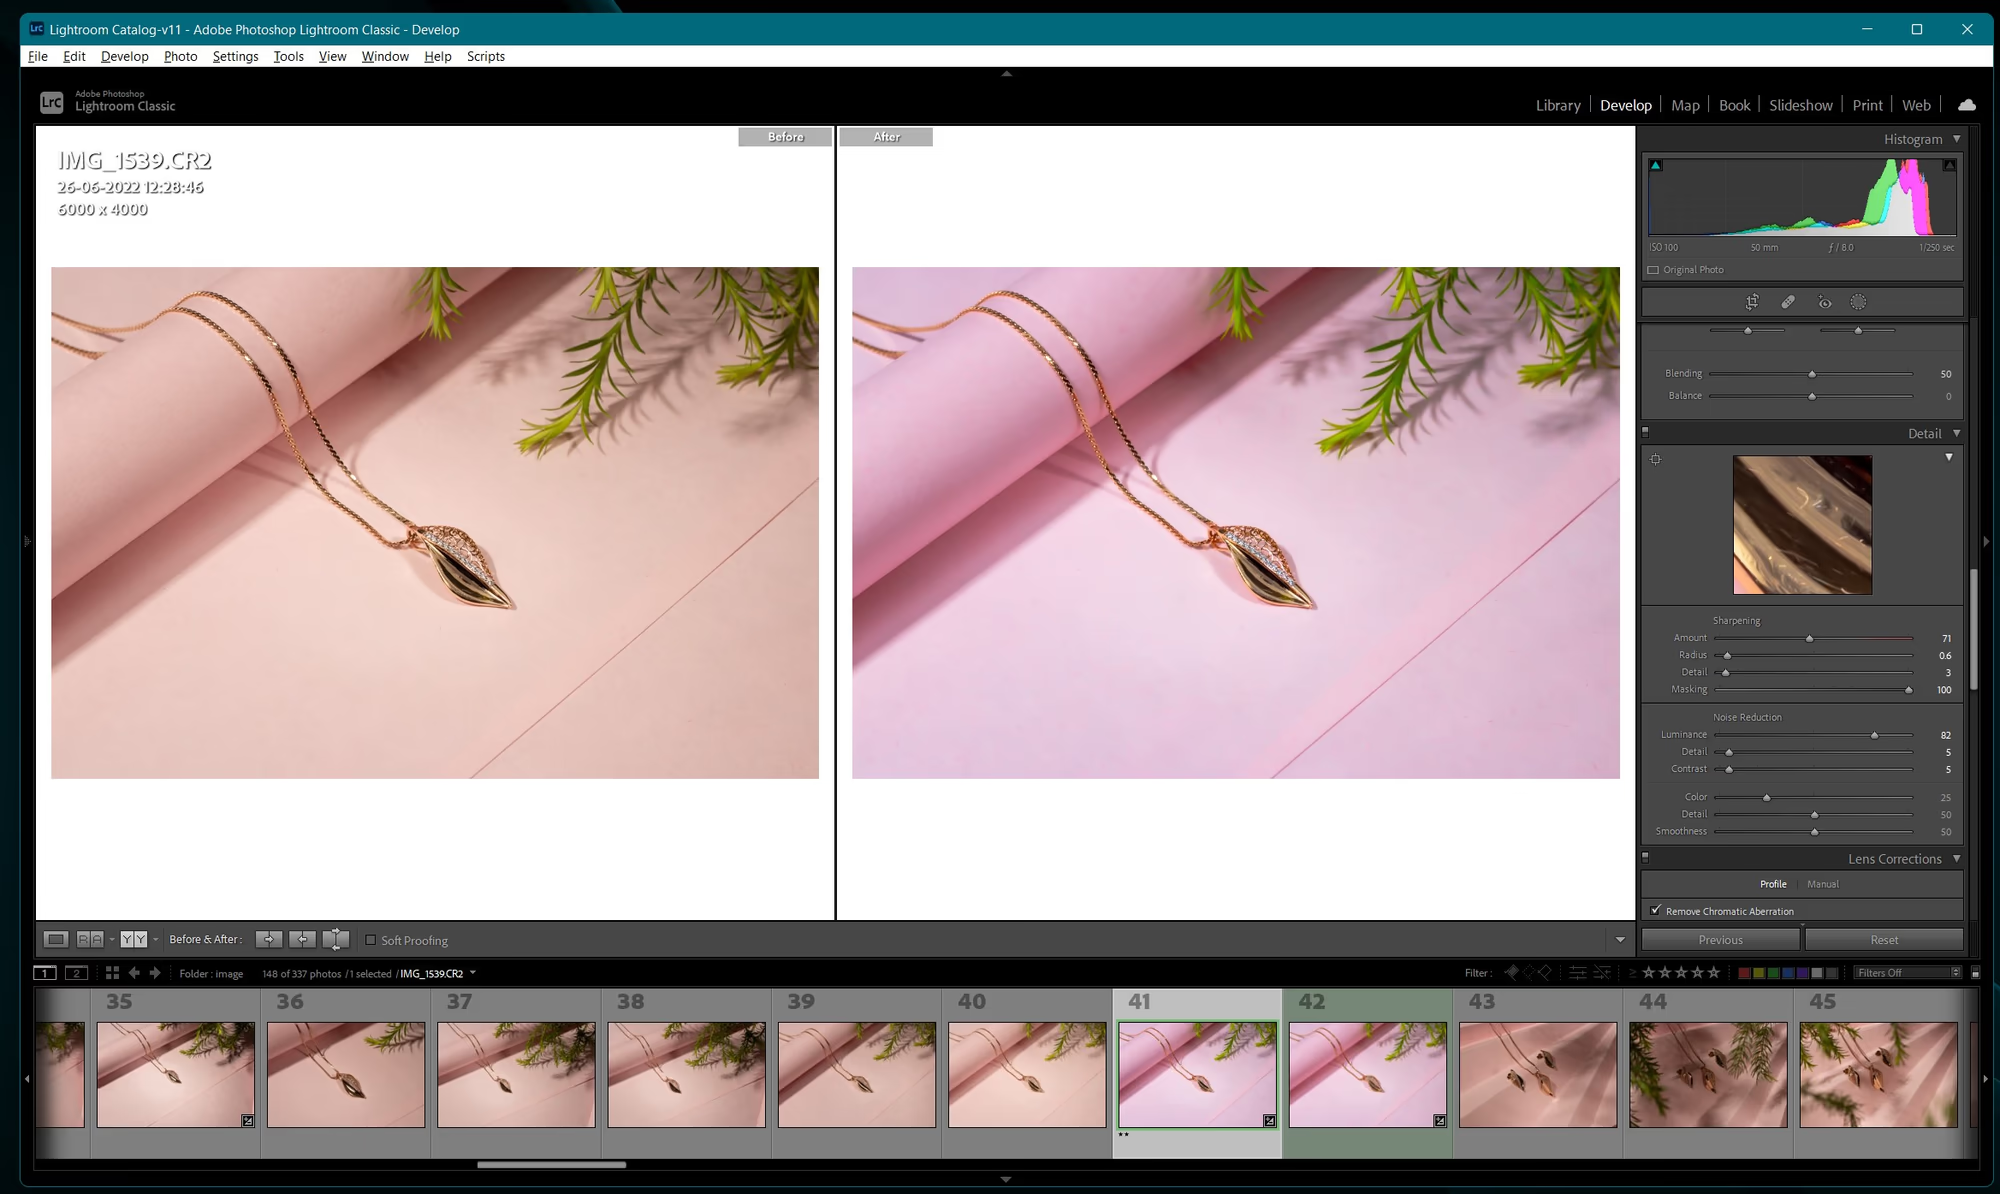
Lightroom is a good tool for basic colour correction and balancing the image. You will be surprised to hear that it can remove dust and scratches.
Here is a simple trick for dealing with Jewellery that has fine scratches only.
Let us see Step by Step how to use this method.
Select the image in Lightroom.
Switch to Develop Tab.
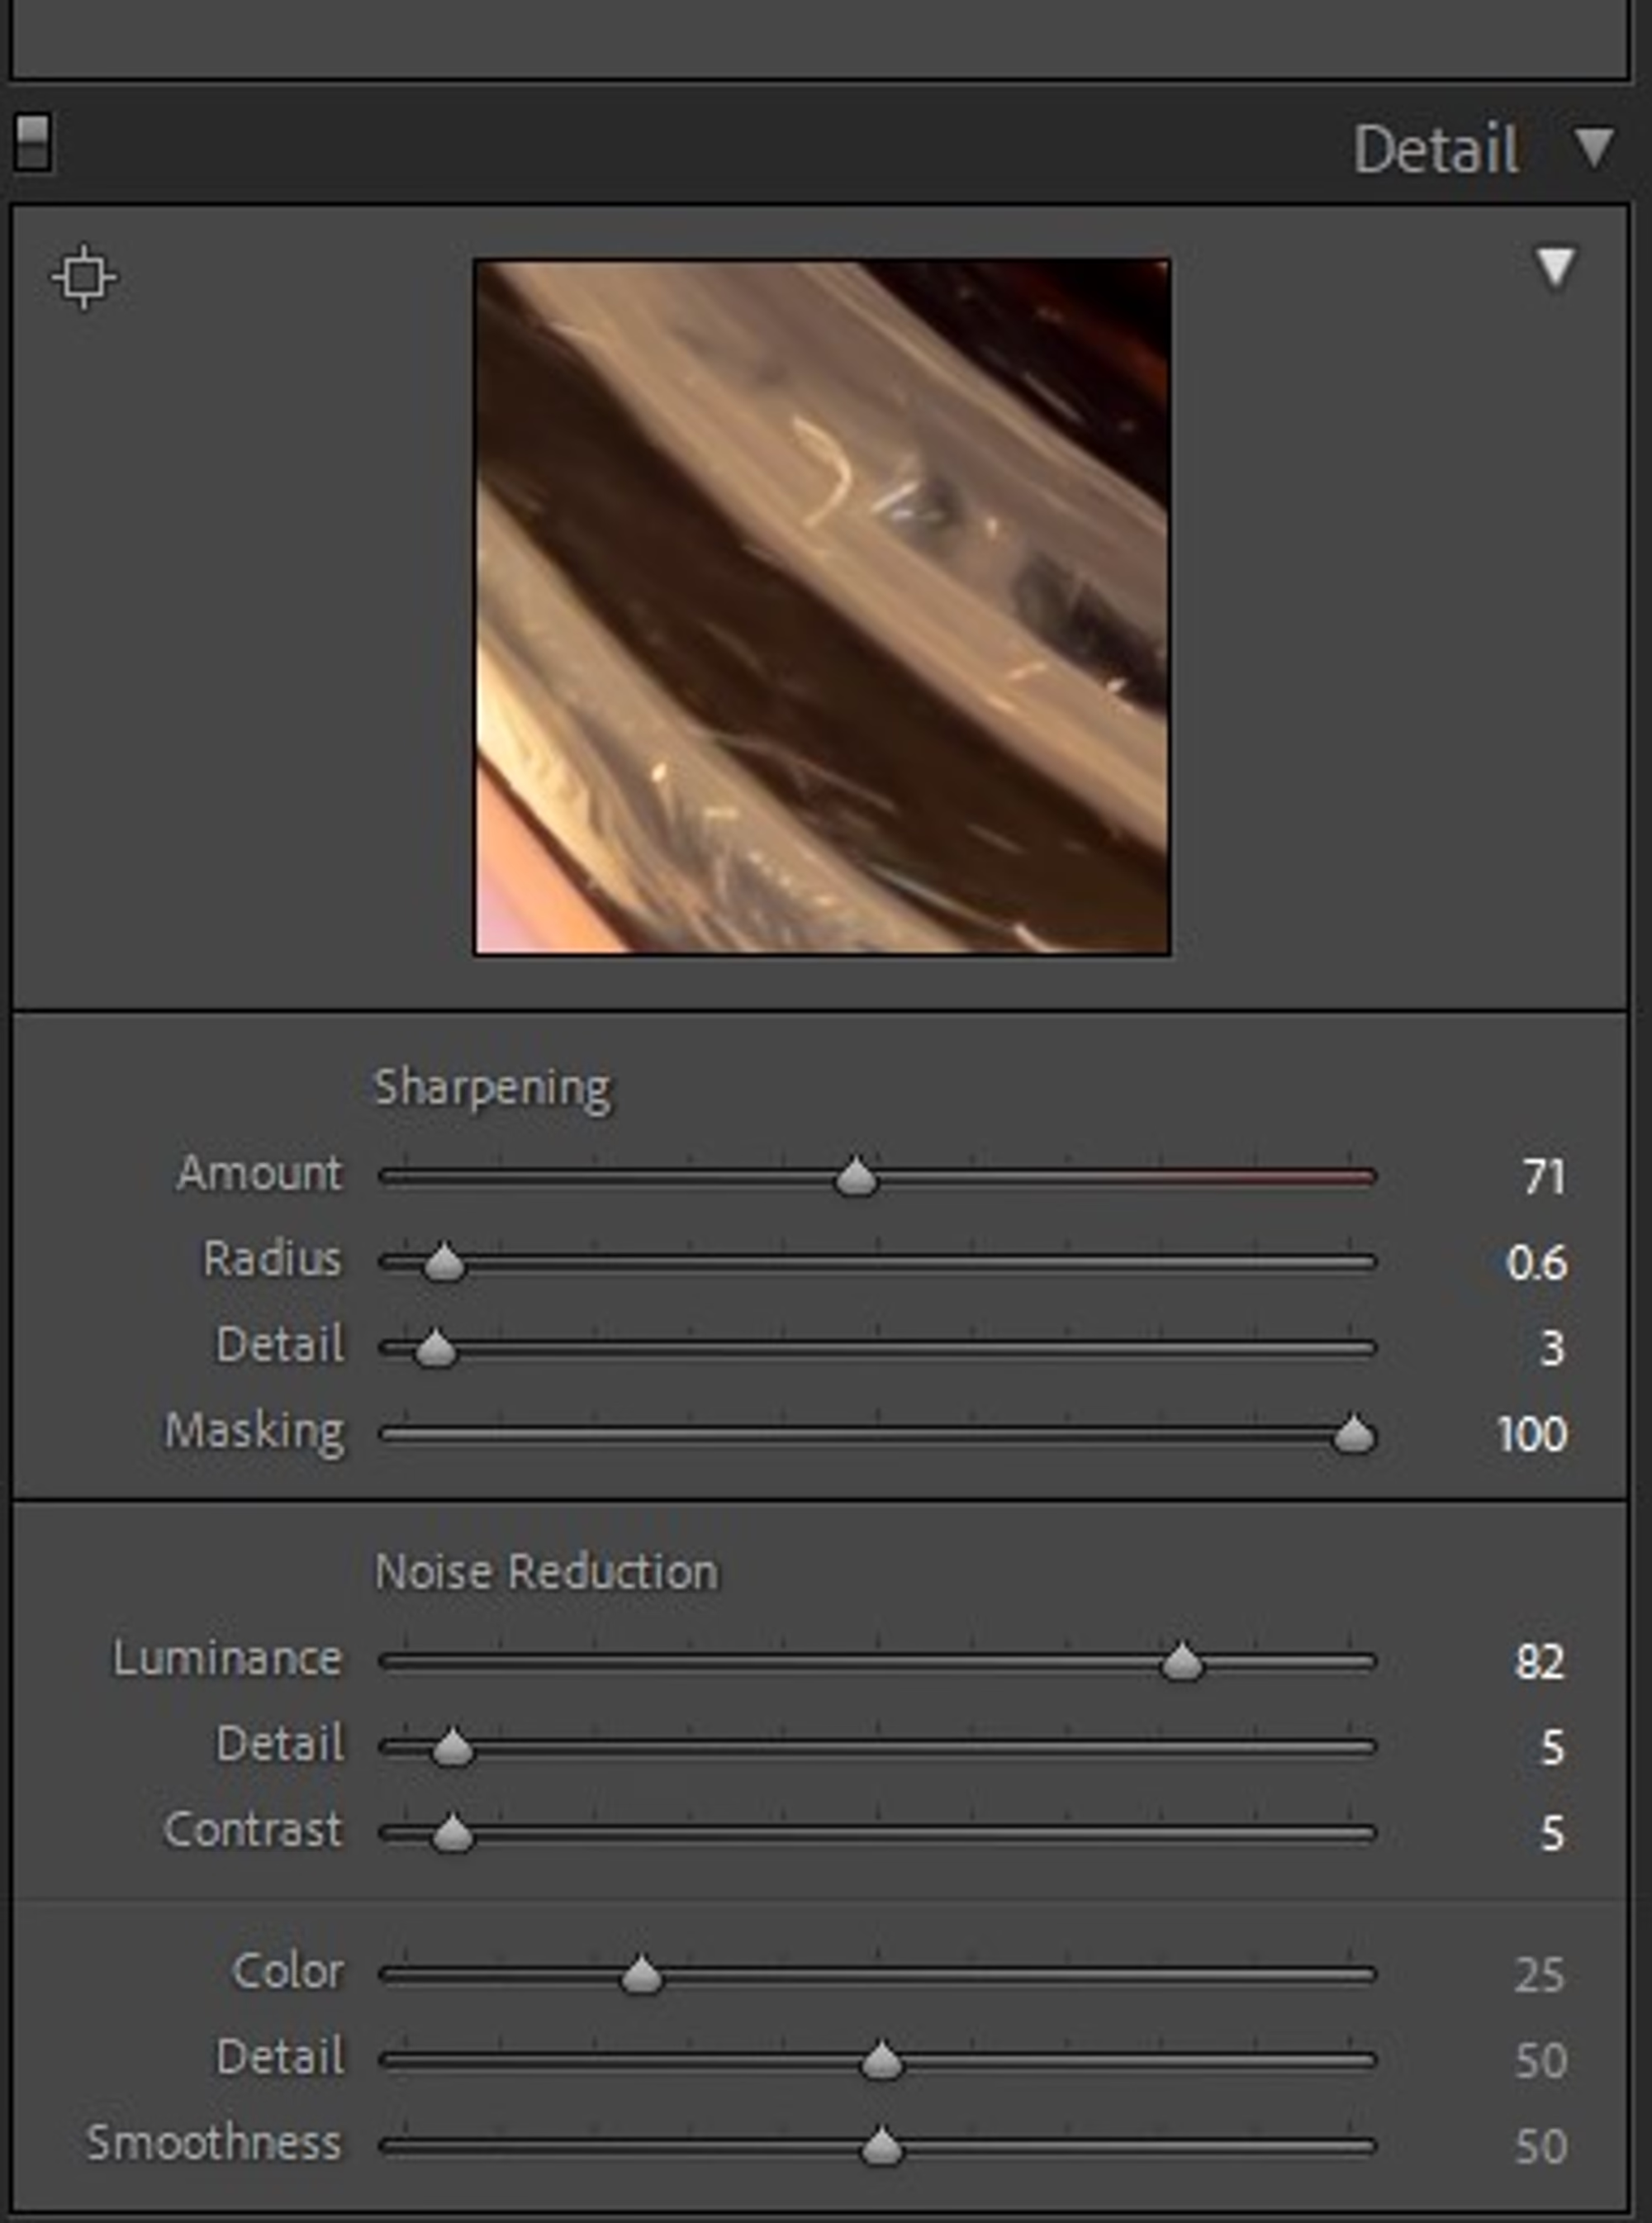
Go to the Details Panel.
We have two options here. One is Sharpening and Noise Reduction.
We will work on the Noise Reduction Section.
The first step will be to use Luminance and Colour Slider in Noise Reduction.
As you increase the value of these sliders, you will see fine scratches disappearing.
Now you will have to either add details back or sharpen the image depending on the look you want.
A balance between Sharpening and Noise reduction will give the best results.
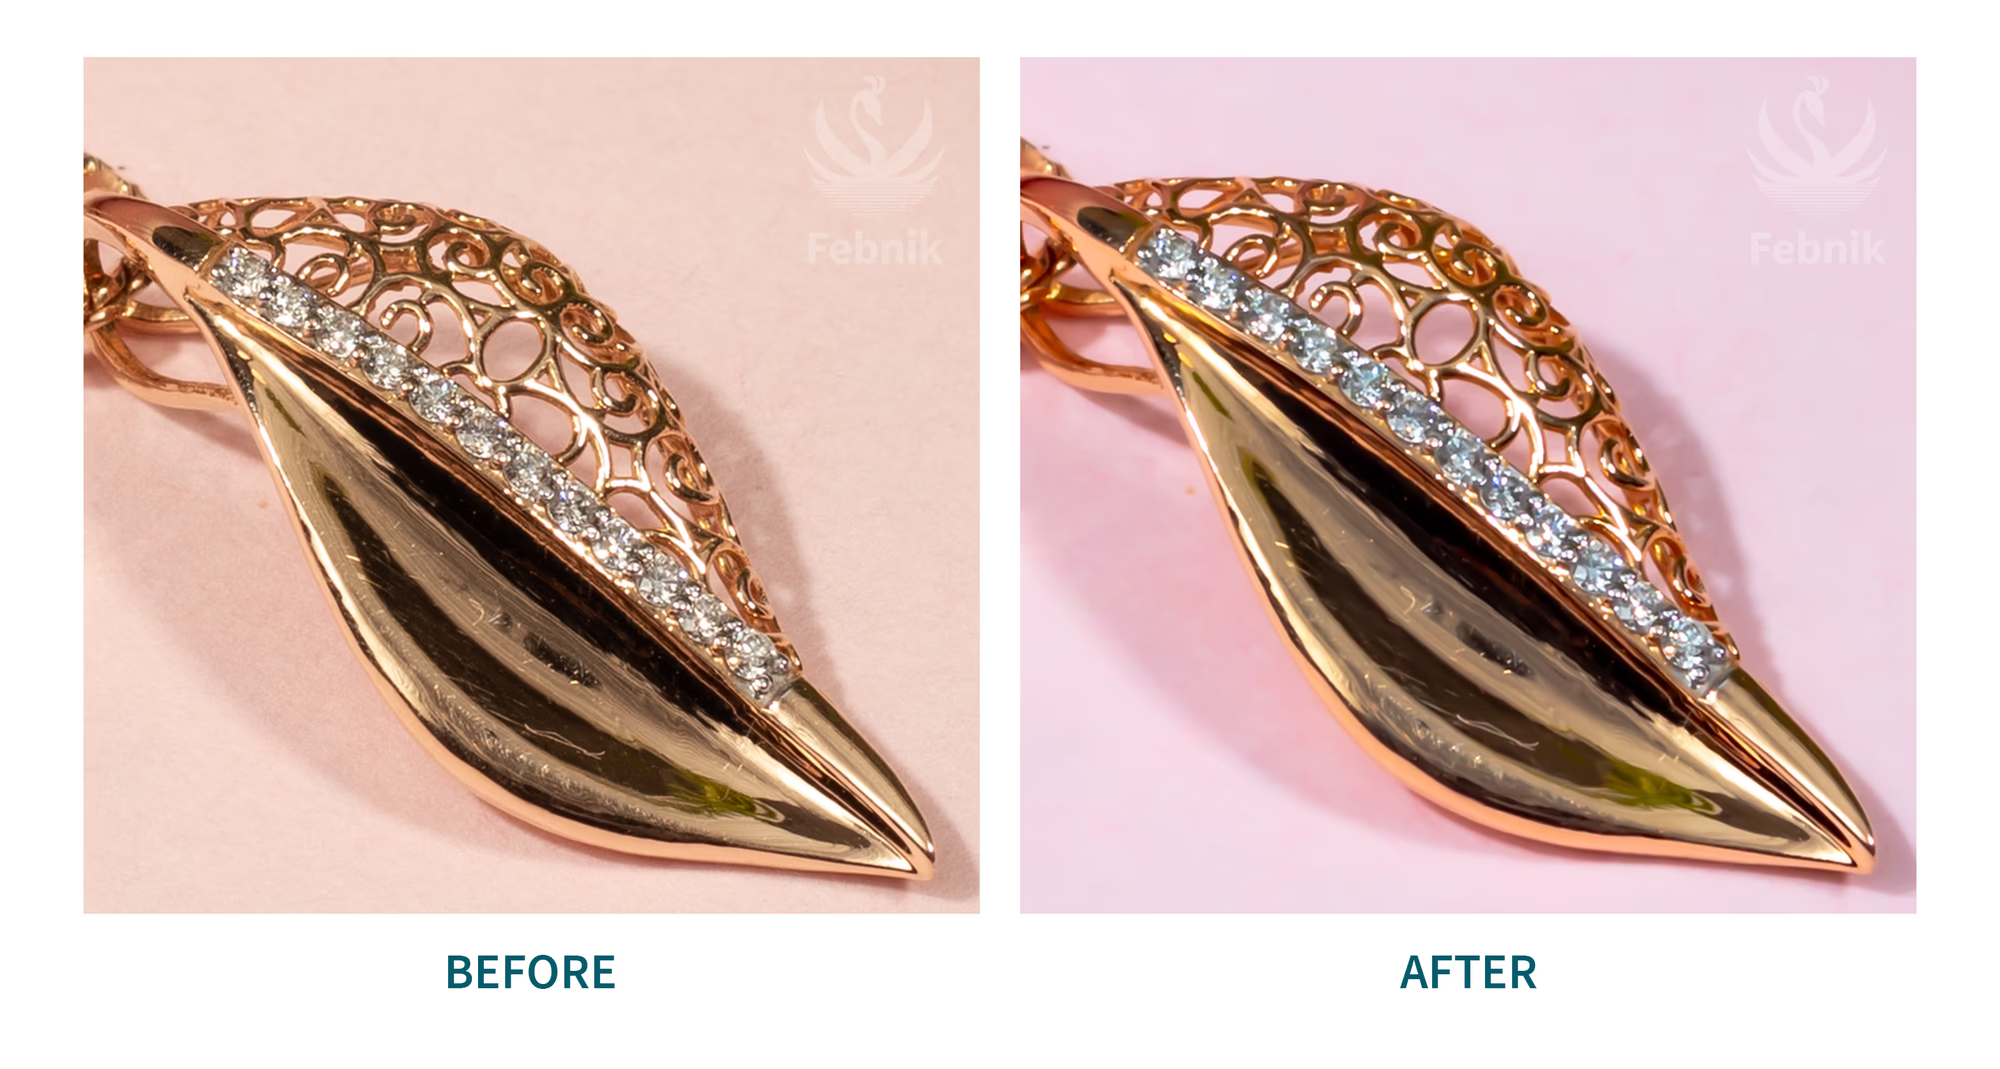
Before After Details Panel Scratch Removal
With this method, you have to be careful and while doing so, keep your adjustment subtle. The noise reduction process smooths pixels. You can remove the fine scratches with the help of it.
Note that your goal is never to eliminate noise. Instead, focus on reducing the colour difference caused by scratches on the surface.
This technique works for quick-paced edits and low-end projects. If you are working on expensive jewellery, we have other methods available to us. Read on to find out which one works for you.
Luckily for Photoshop Users, we have multiple techniques. If you want to make the Jewellery flawless, use these techniques in your favourite combination, for better quality while saving time.
Again, we will start with the simplest. If you are new to retouching, use the first technique and once you master it, move on to the next ones.
Dust scratch filter is similar to blur filters. They all mix the colours and average them. Under the hood, it is a median filter (it is a kind of a blur filter) but with a threshold. This feature allows blurring while retaining small details. Like we can keep the texture while averaging out the colours.
Let us see how to apply this technique.
Usage of this technique requires a Layer or Smart object.
Create a new layer and use the shortcut Ctrl + alt + shift + E. It will fill the layer with a stamp of all the contents.
If you are working on a new document, duplicate the background.
Select your new layer
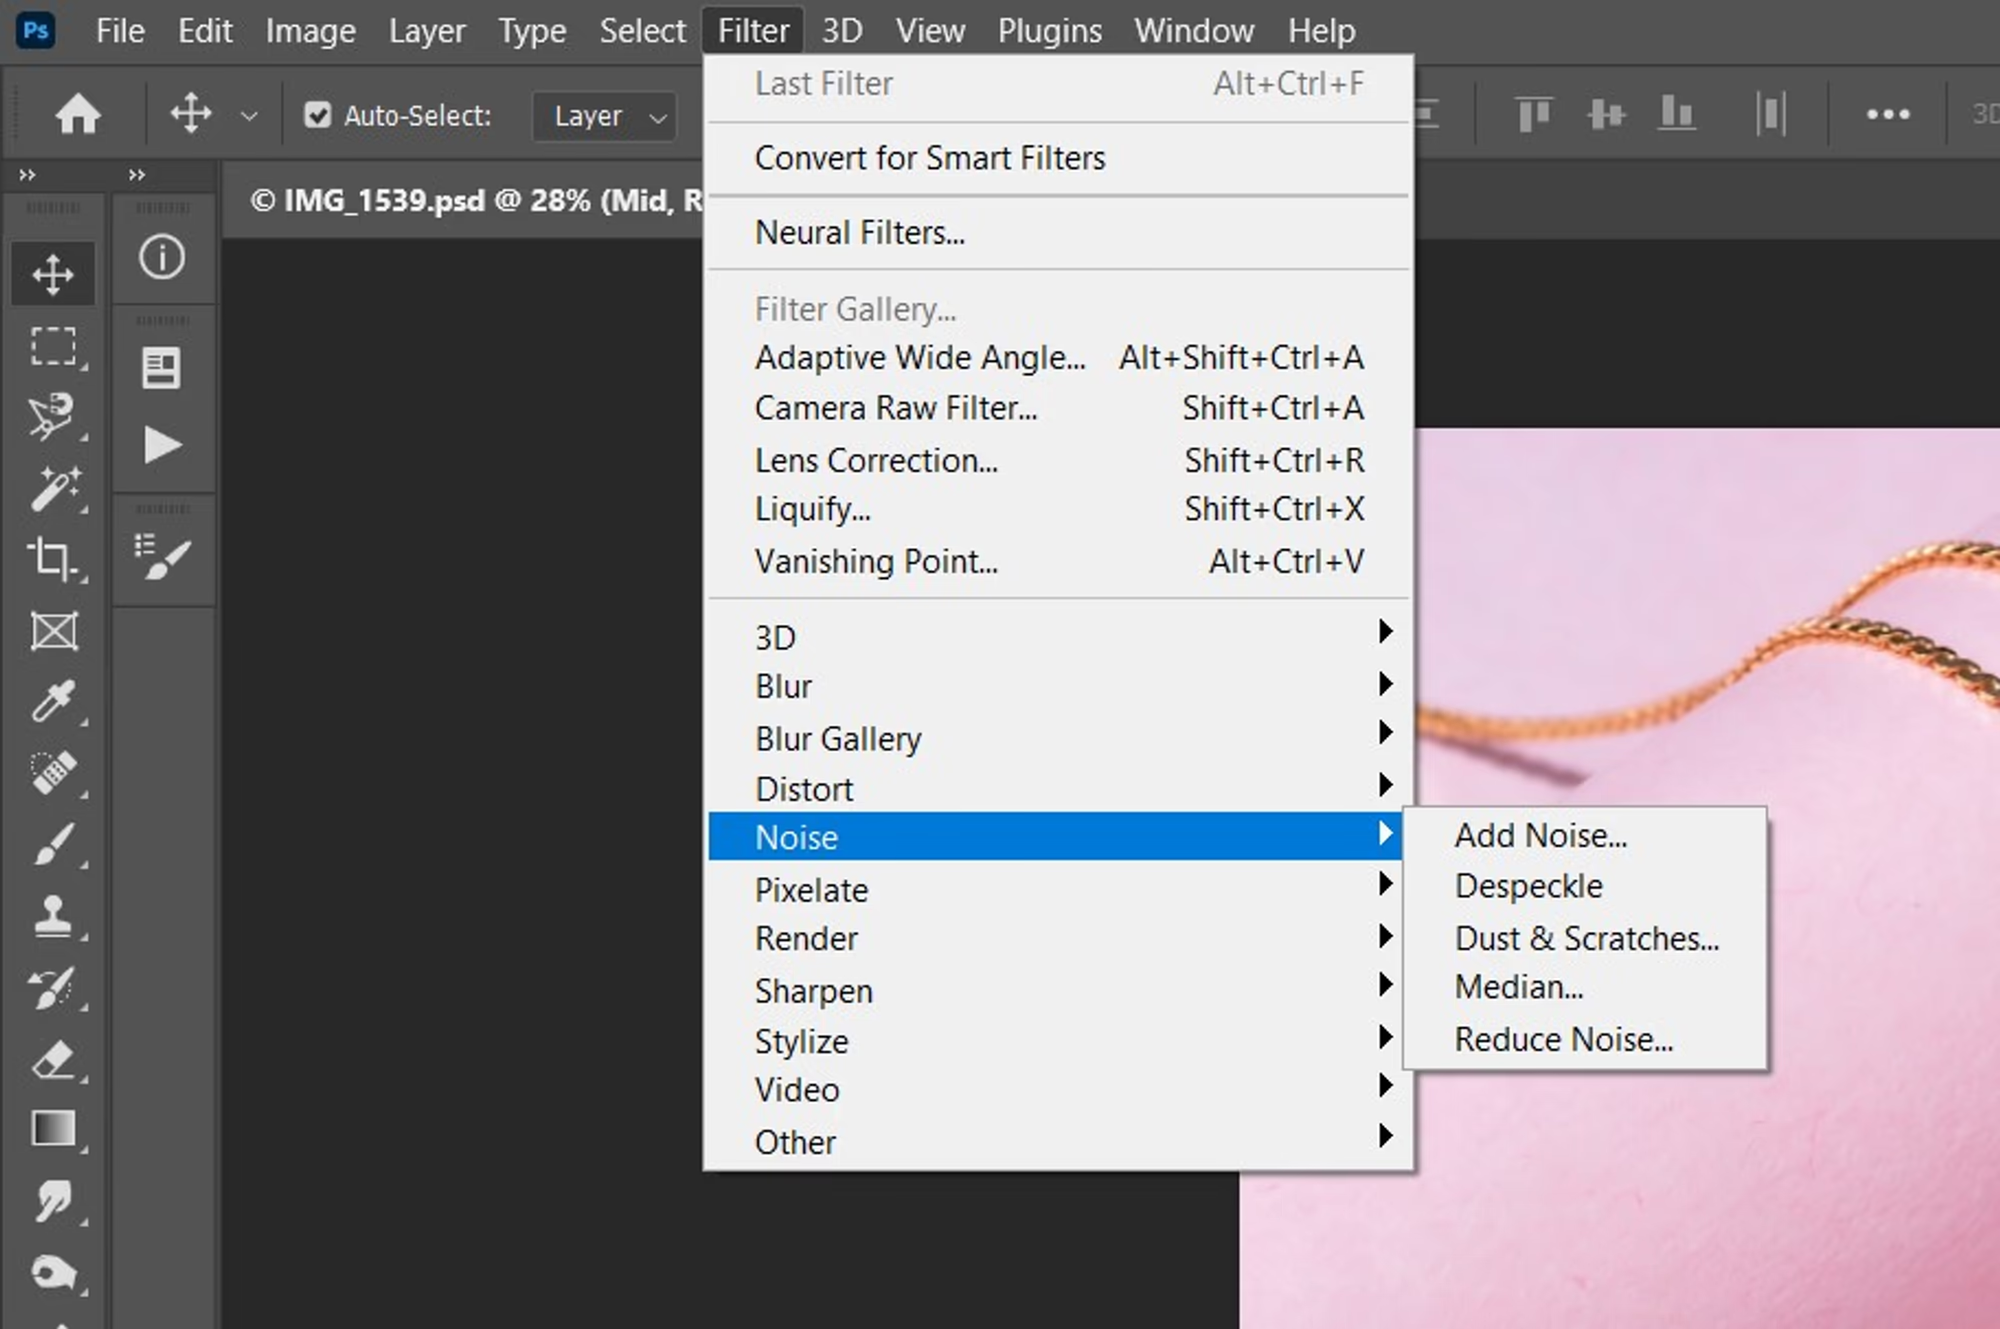
Go to Filter Tab
Select Noise
Select Dust and Scratches
The panel will open up with two settings;
Radius: It tells the filter what the size of the blur. Understand it as the size of detail you want to remove.
Threshold: This tells the filter how much detail you want to recover. It is a scale from 0 to 255, with higher values retaining more.
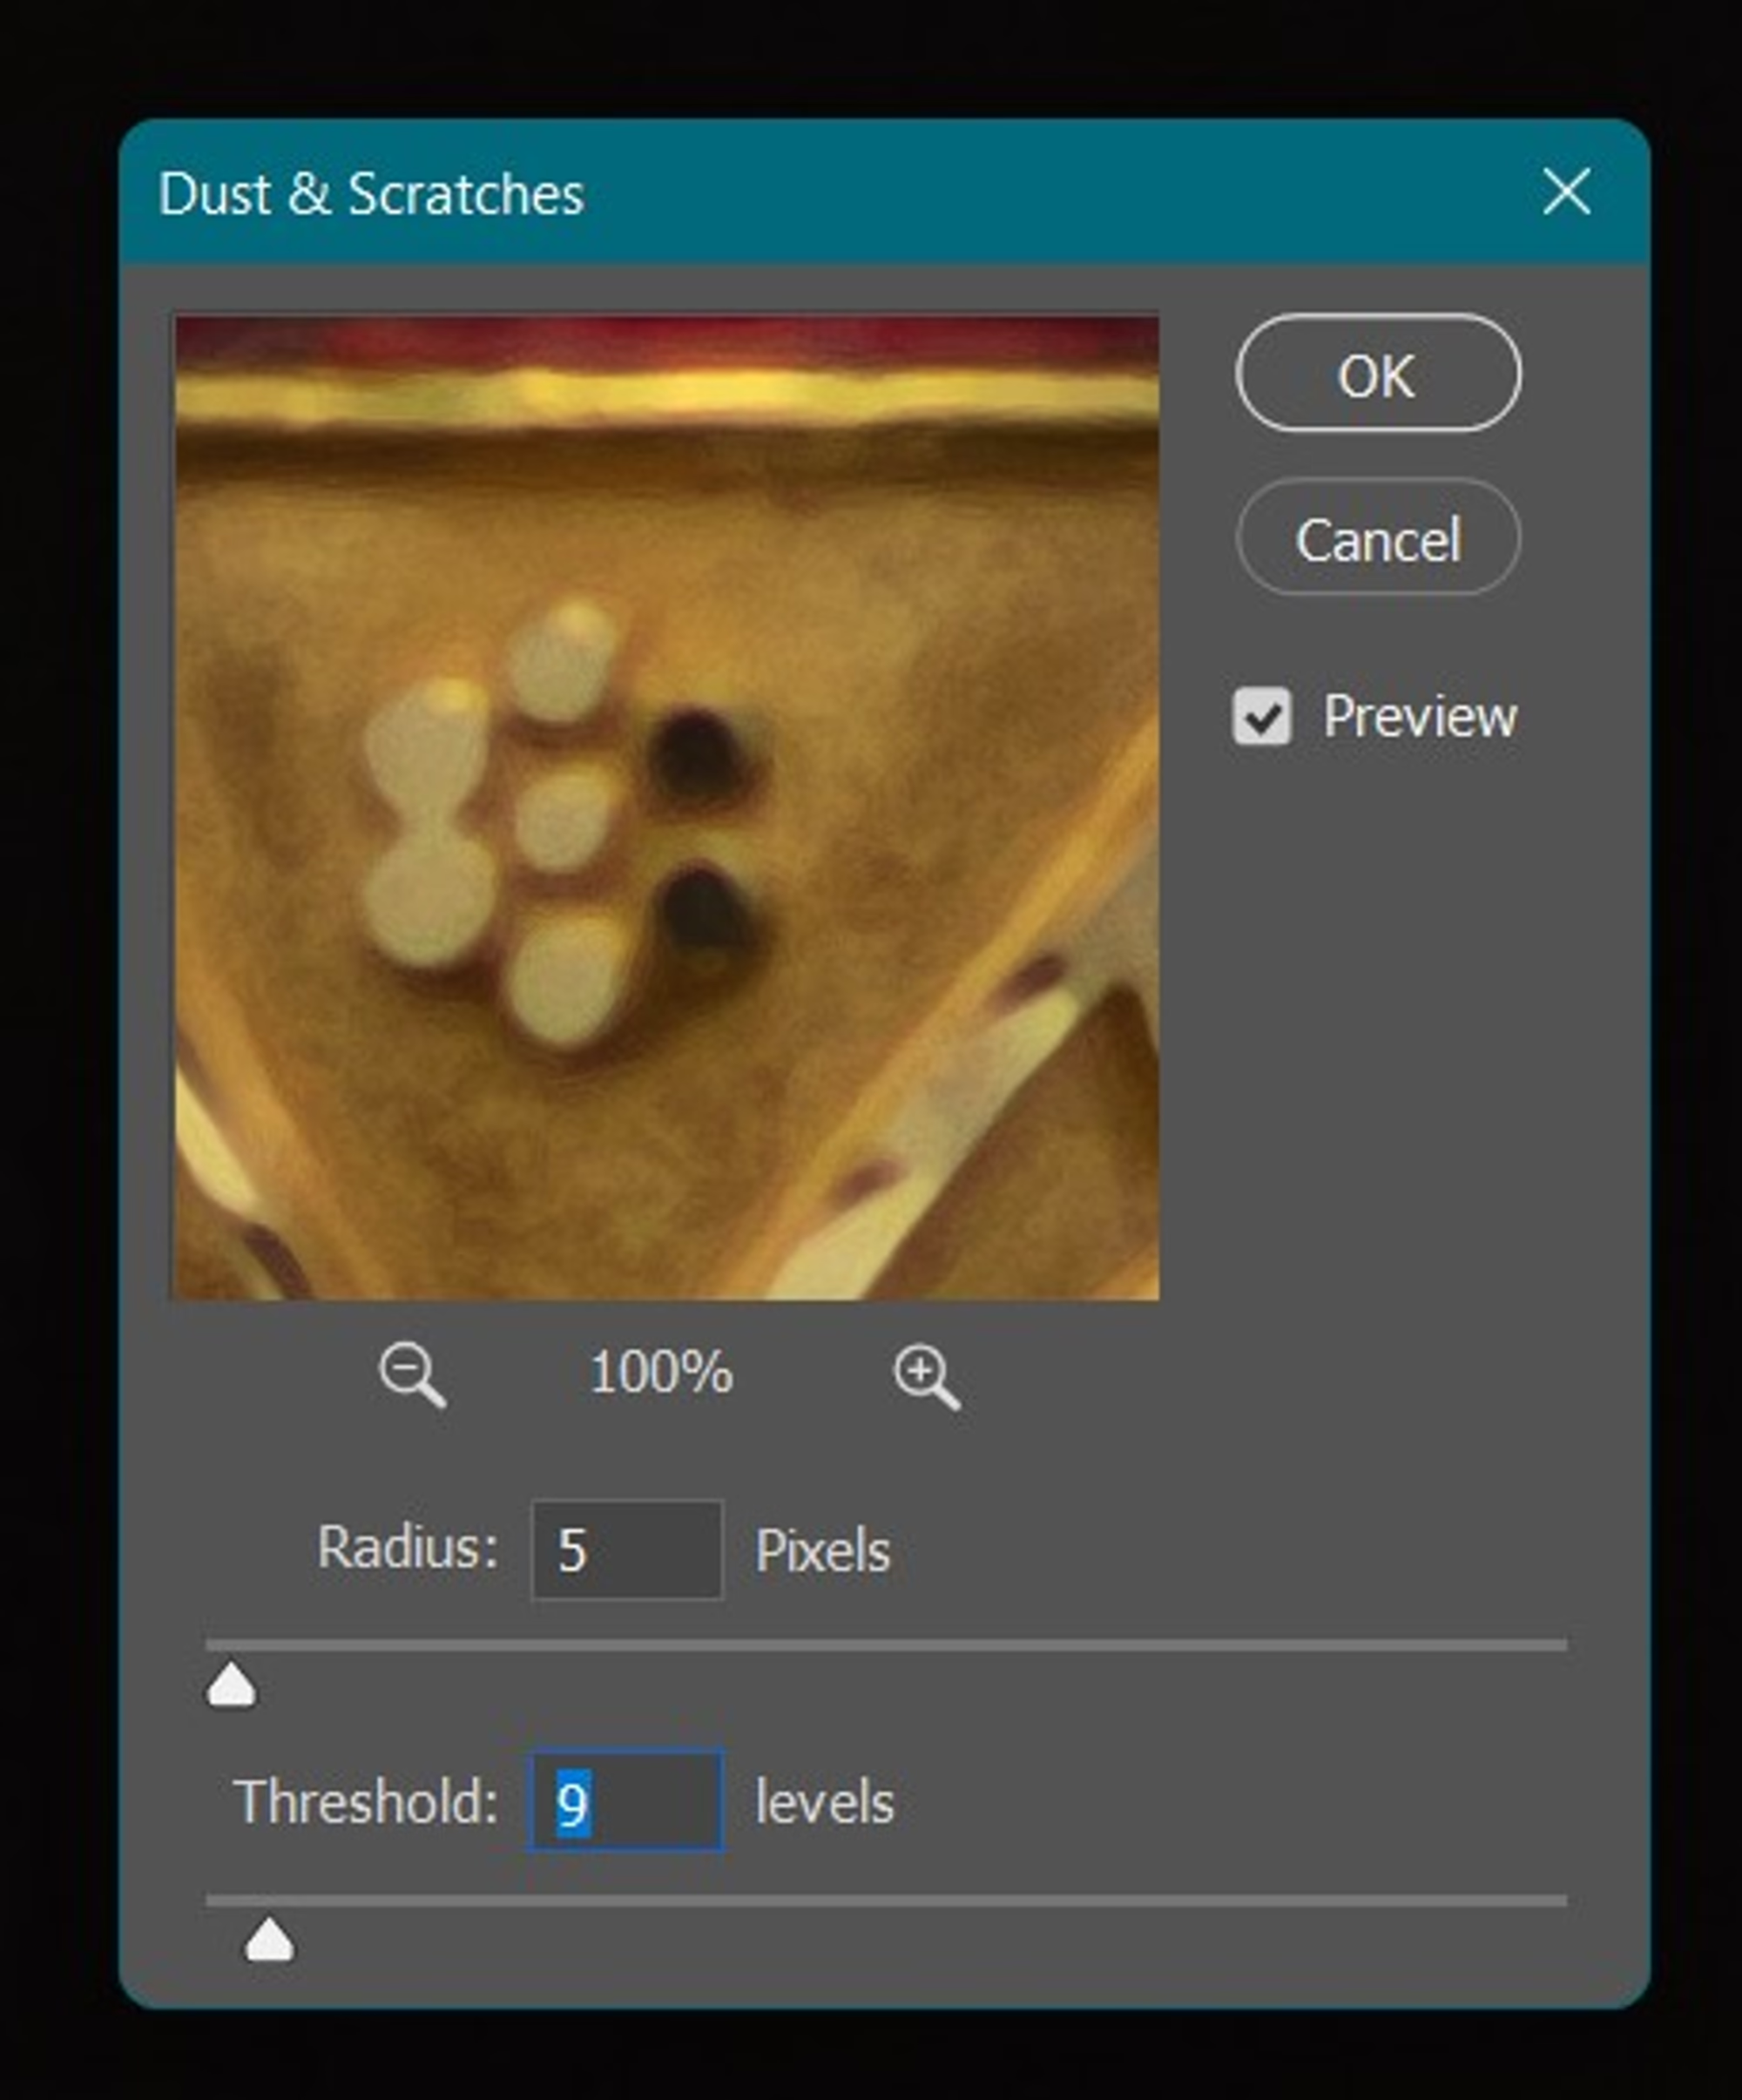
Find a suitable setting for you and apply this filter.
Then add a mask to the layer and invert the mask.
Control this mask by painting it with a brush and white colour.
This way, we can selectively apply this technique and the rest of our image will be unaffected.
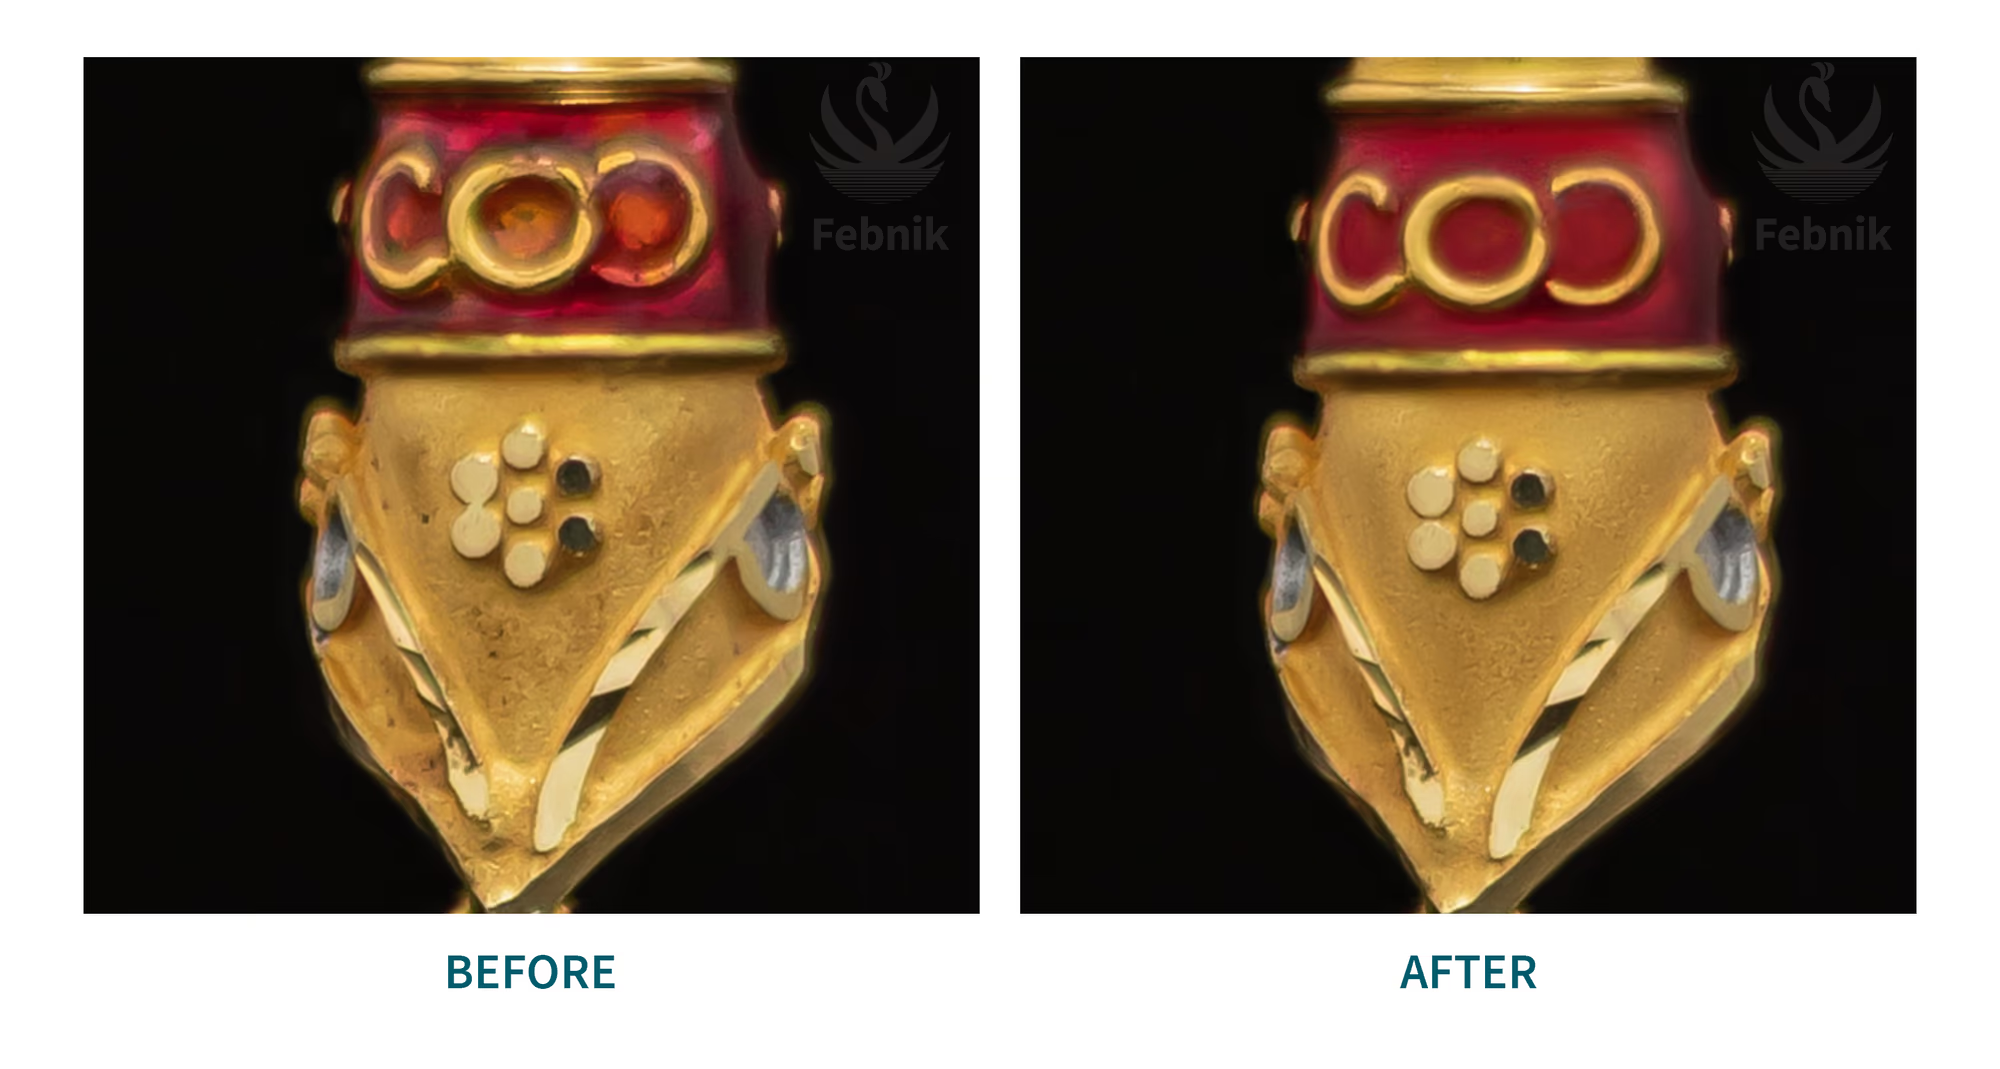
Let us see the before and after.
Before After Dust and Scratches Filter
I use this method for images of expensive Jewellery. This method will keep all the textures in the pictures and save effort. Now let us move on to another technique.
Expensive Jewellery has the perfect shape and details. Almost like they were made by a machine. Its surface only has fine marks, but cheap Jewellery has prominent flaws. The healing technique is the best for fixing these flaws. We have two options: either we can use healing if the issues are simple, but if they are complex, then use stamping.
Let us see how to use this method.
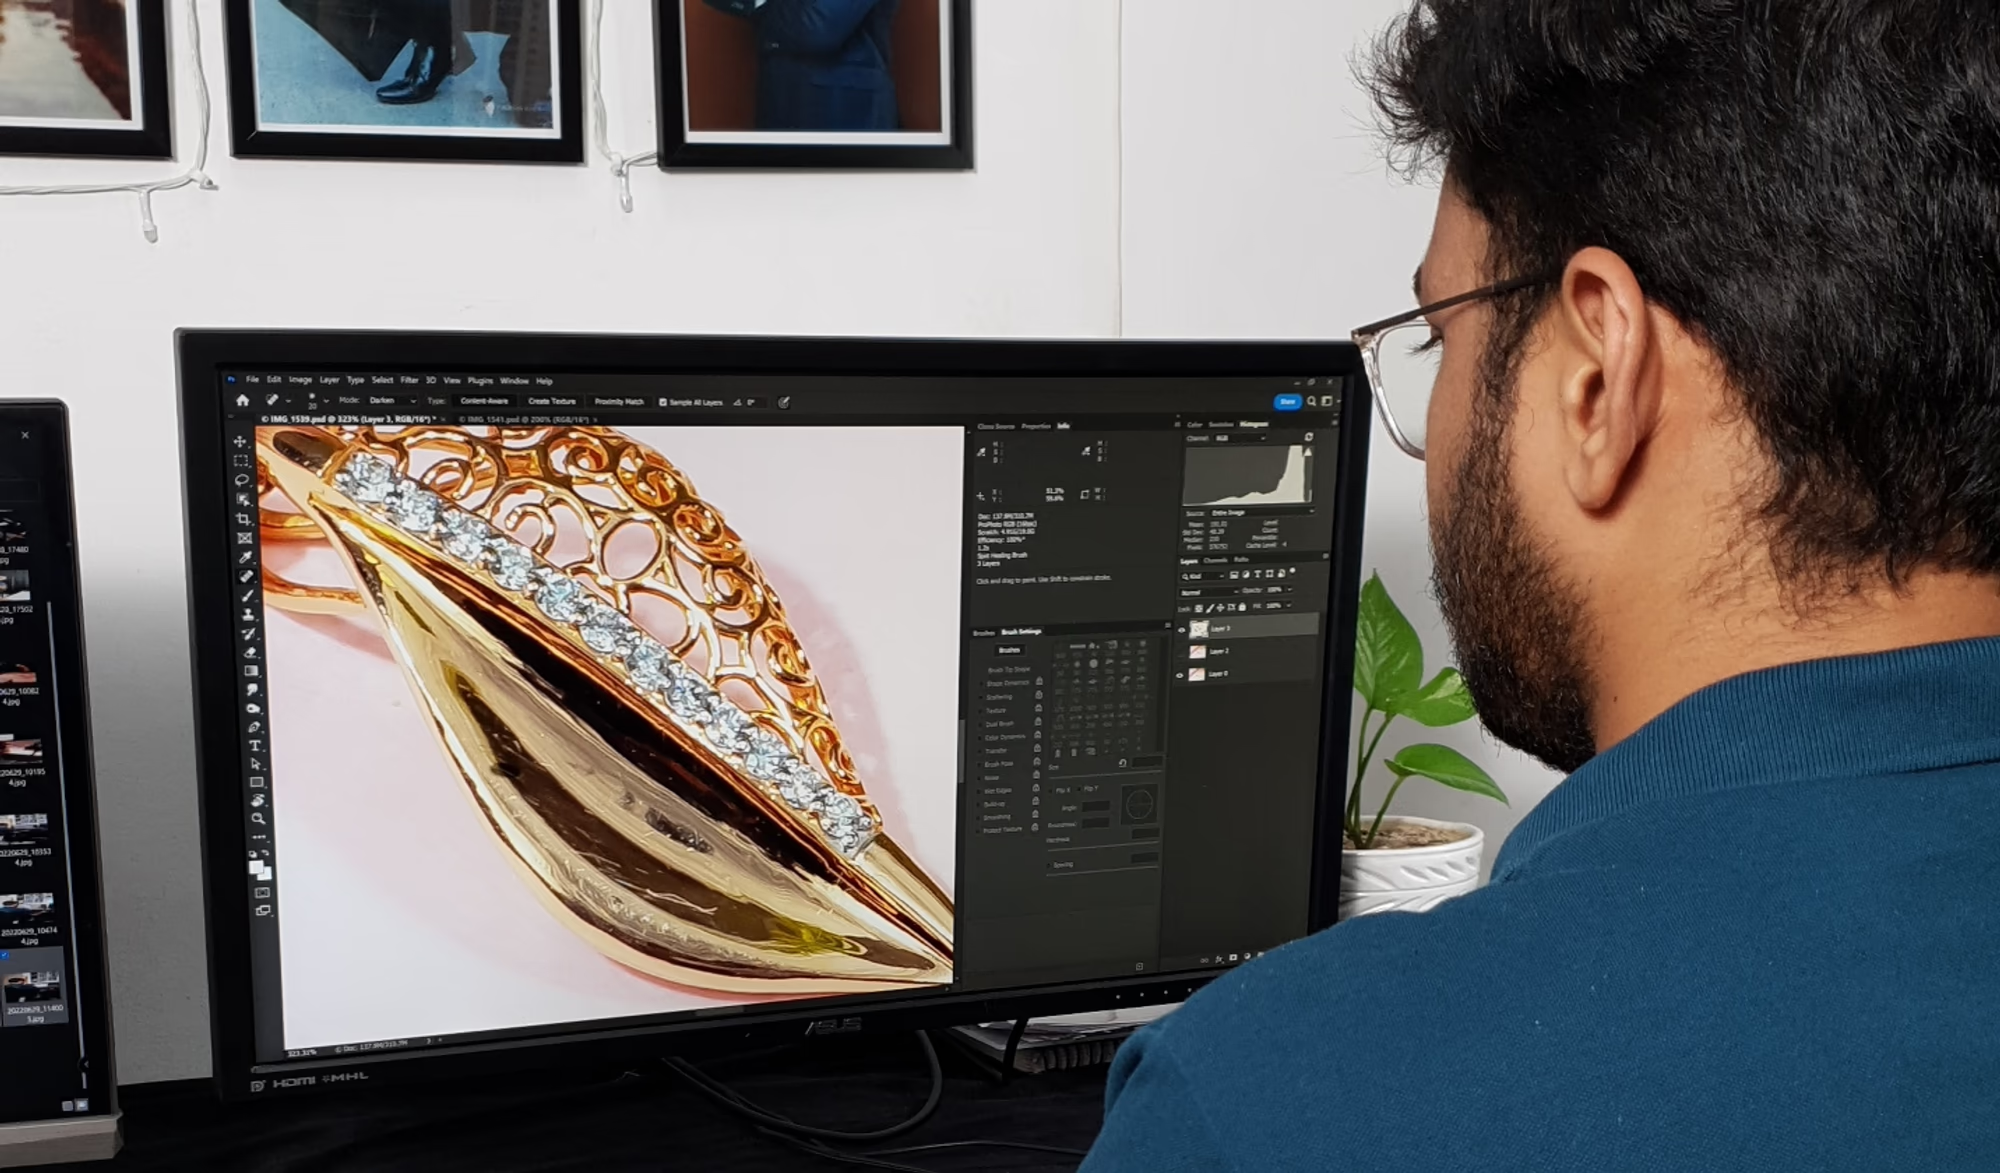
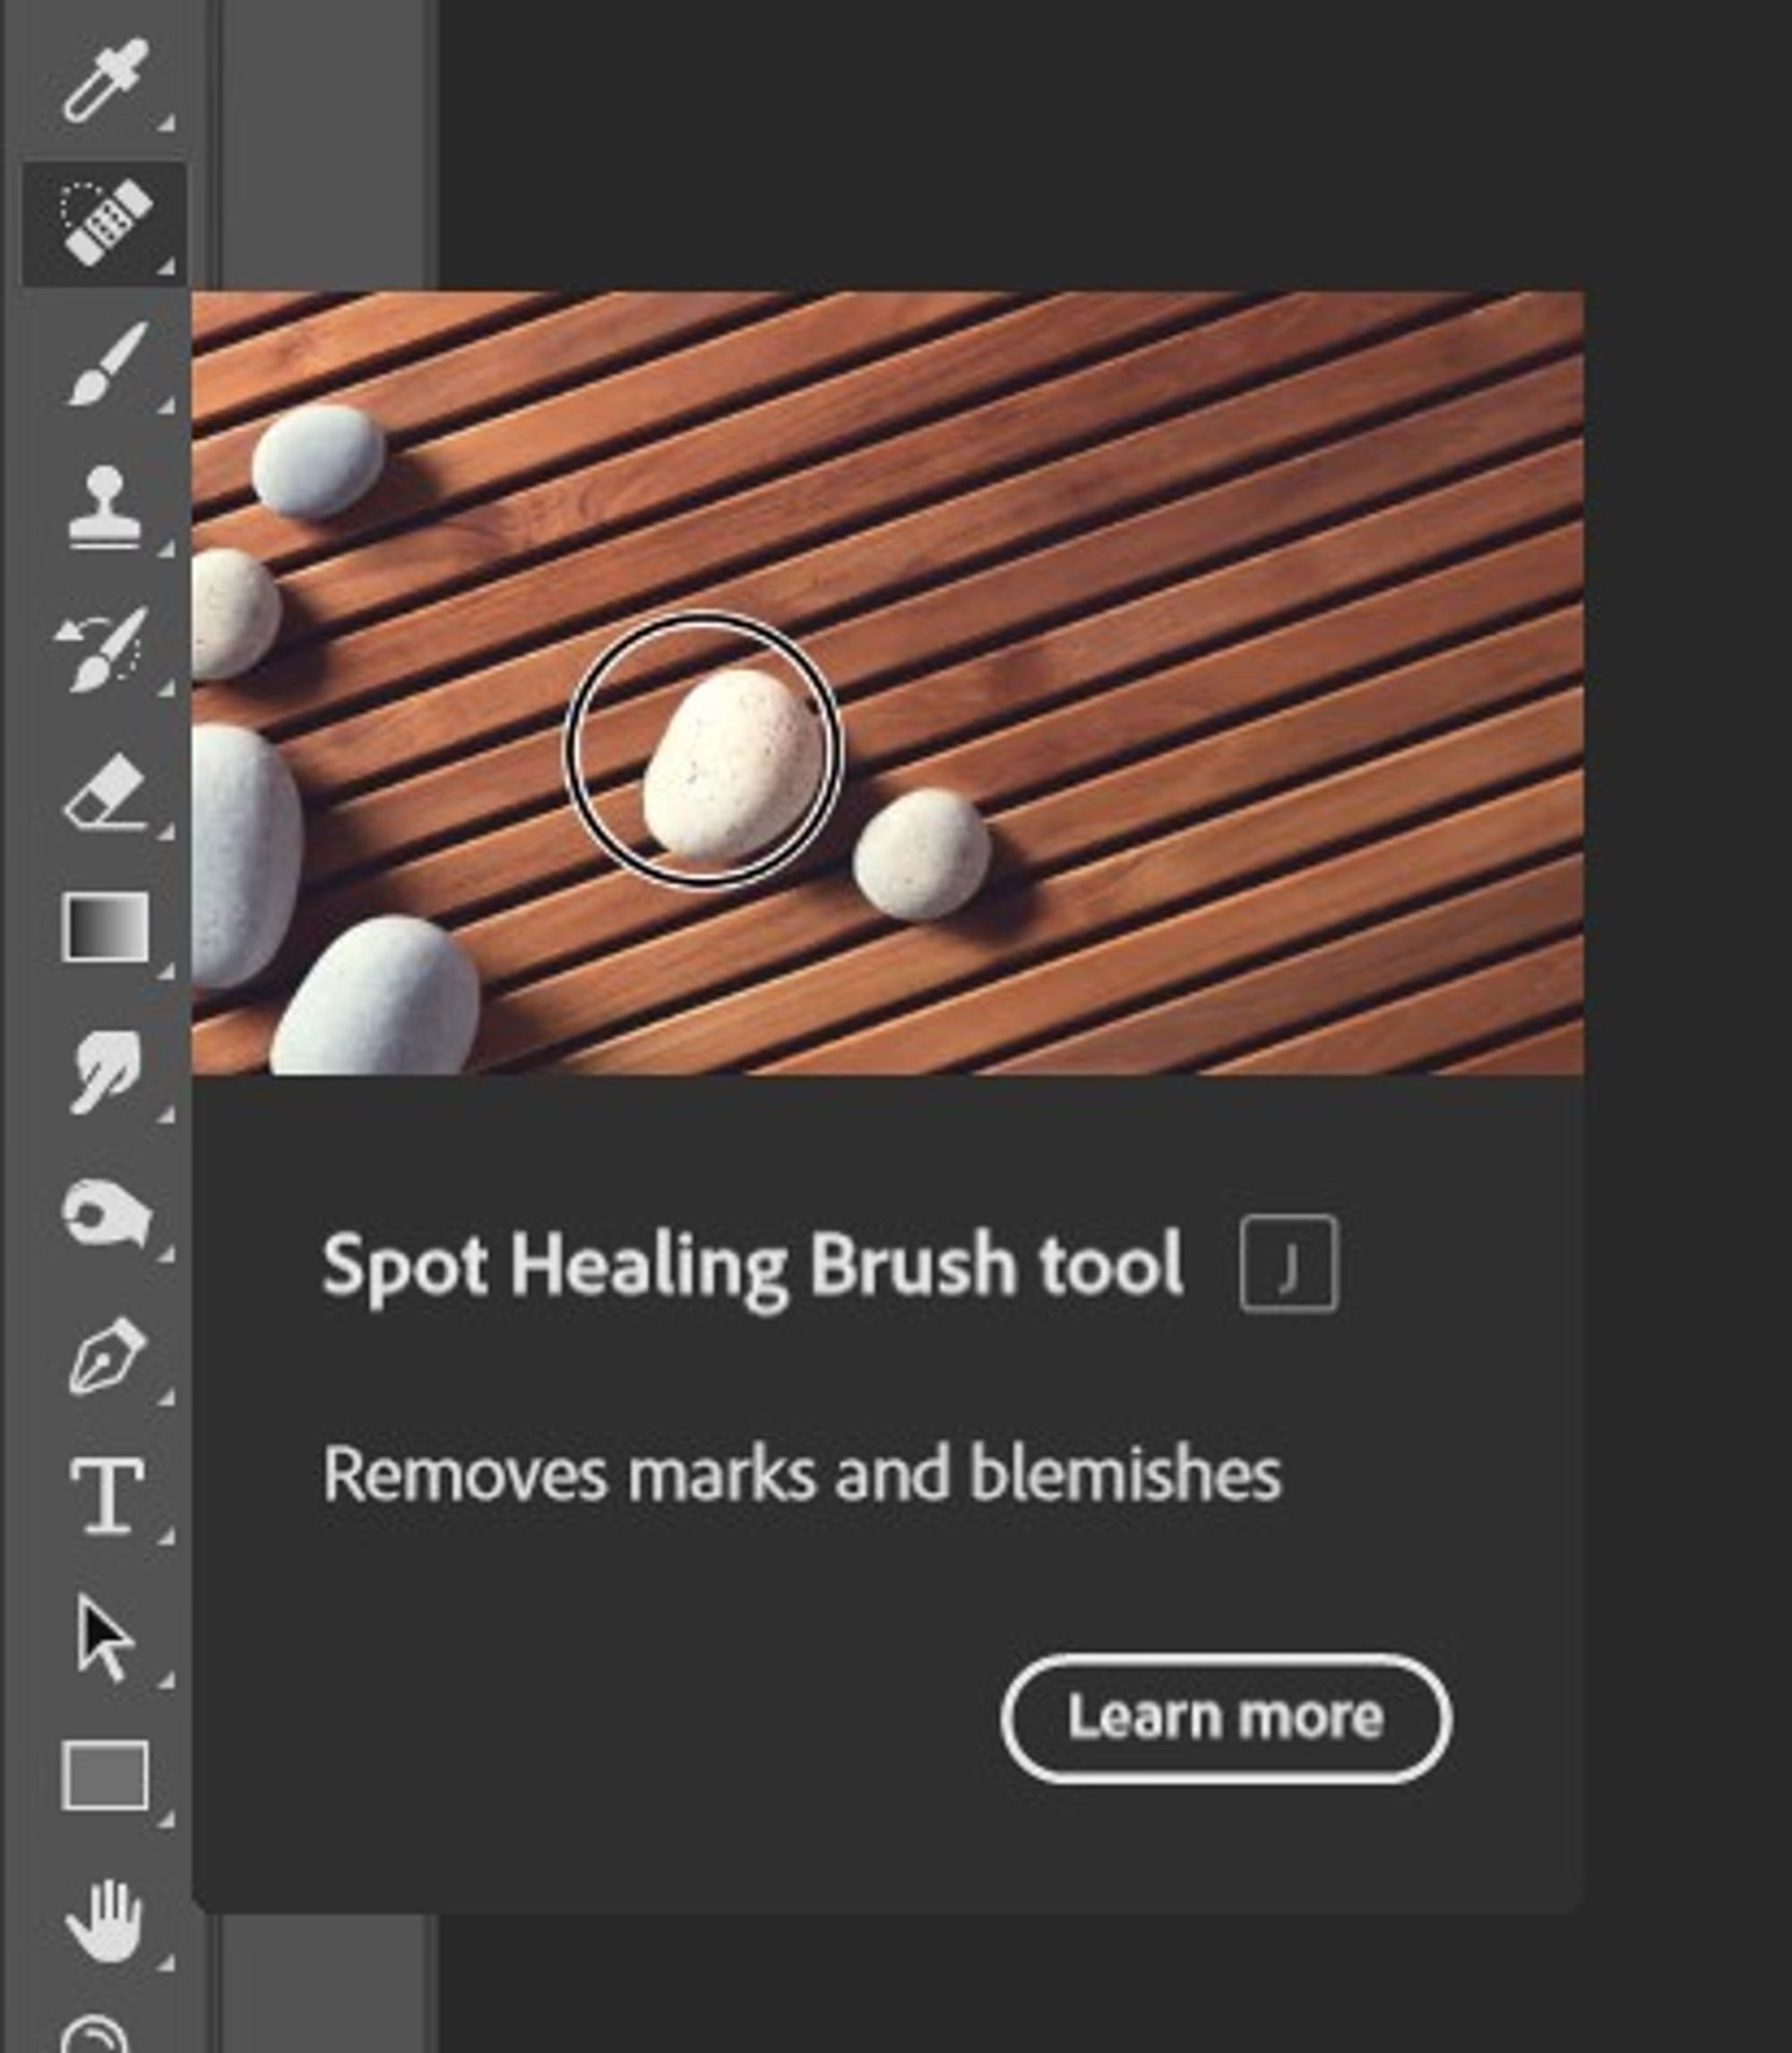
Create a new layer and switch to a healing or stamping tool.
In case of healing, turn on the setting on the top bar Sample All Layers.
For stamping, on the top bar in Sample Selection select All Layers.
Paint your mouse over the imperfection and Photoshop will try its best to fix the issues.
You can remove parts you dislike with the eraser tool and try fixing them again using the same method.
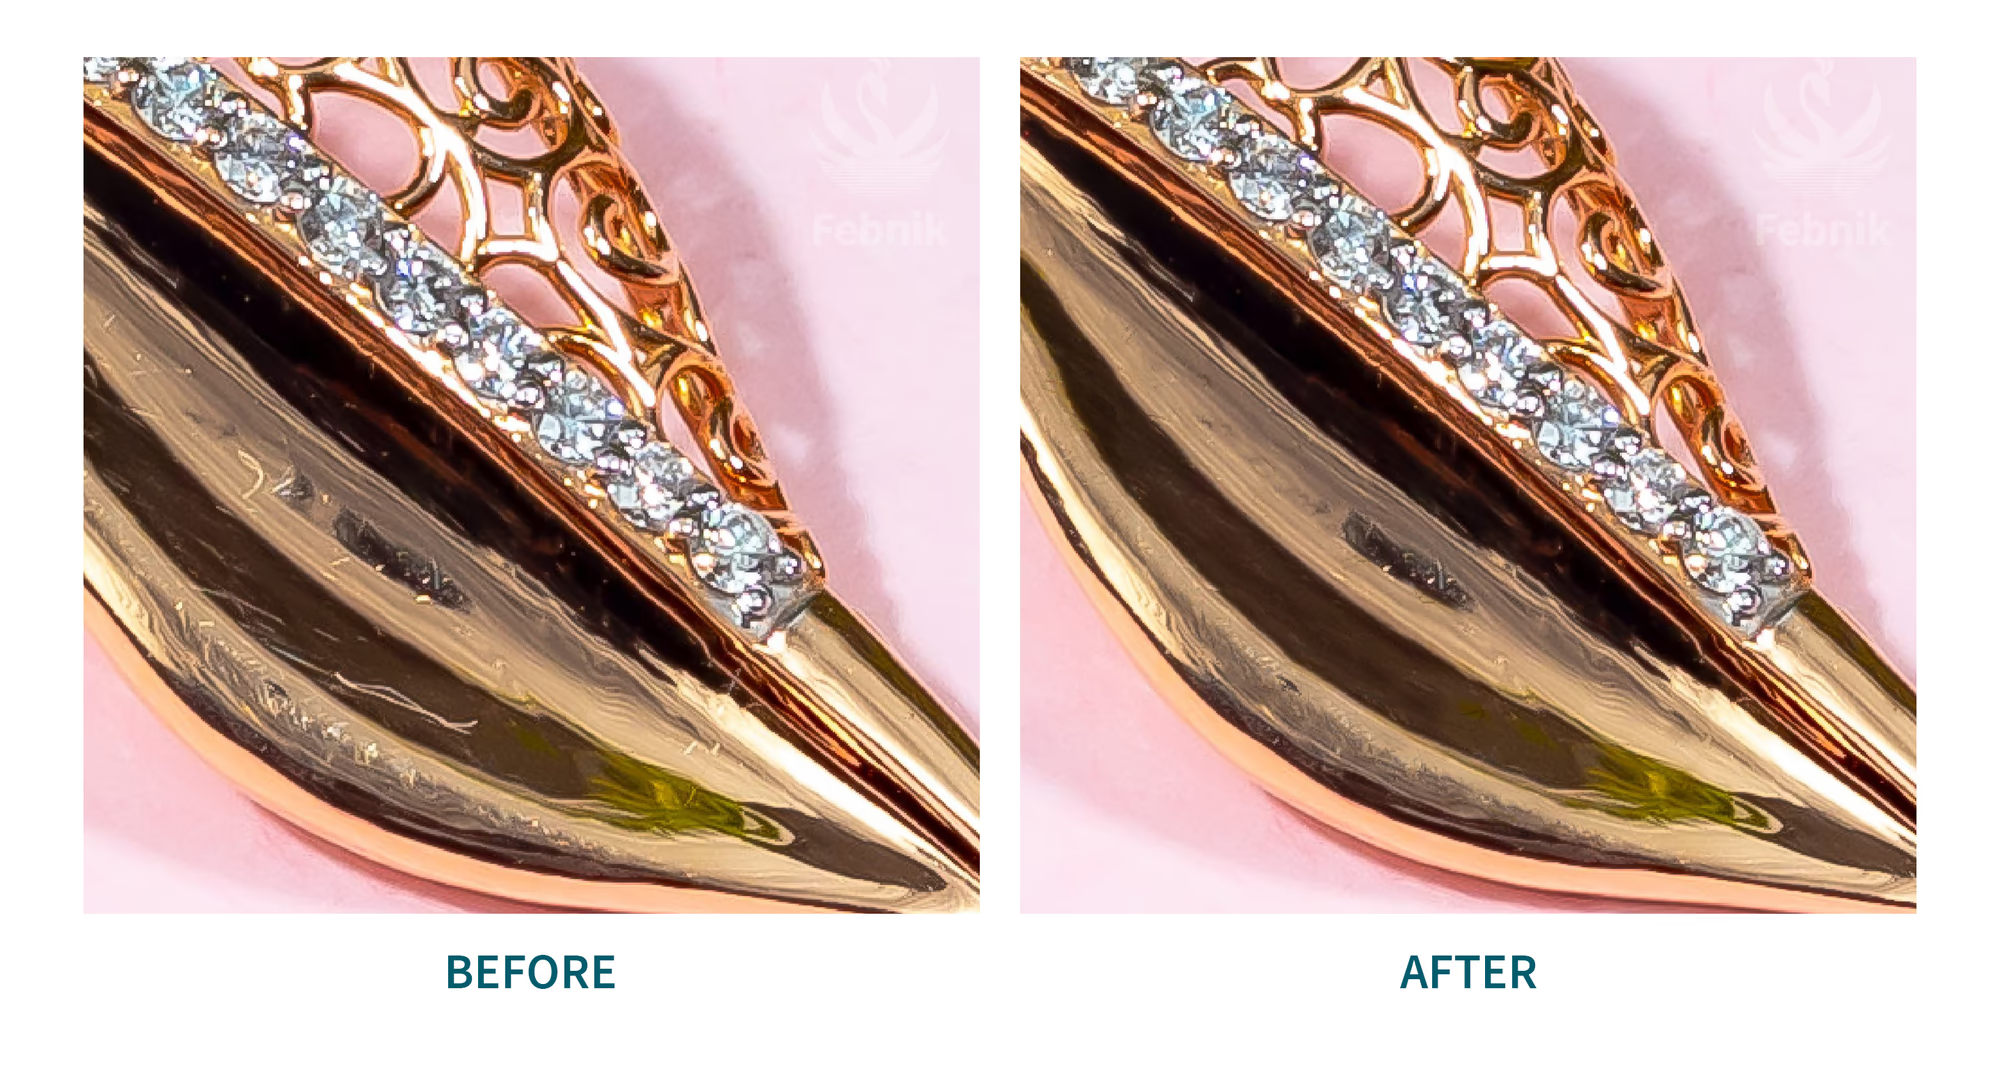
Before After Healing Tool
Healing is suitable only for certain cases, where we want to remove a defect. Doing too much with it can make the image look inconsistent. Talking about consistency, let's look at another case where we want a smoother, consistent look and want to eliminate texture without losing the sharpness.
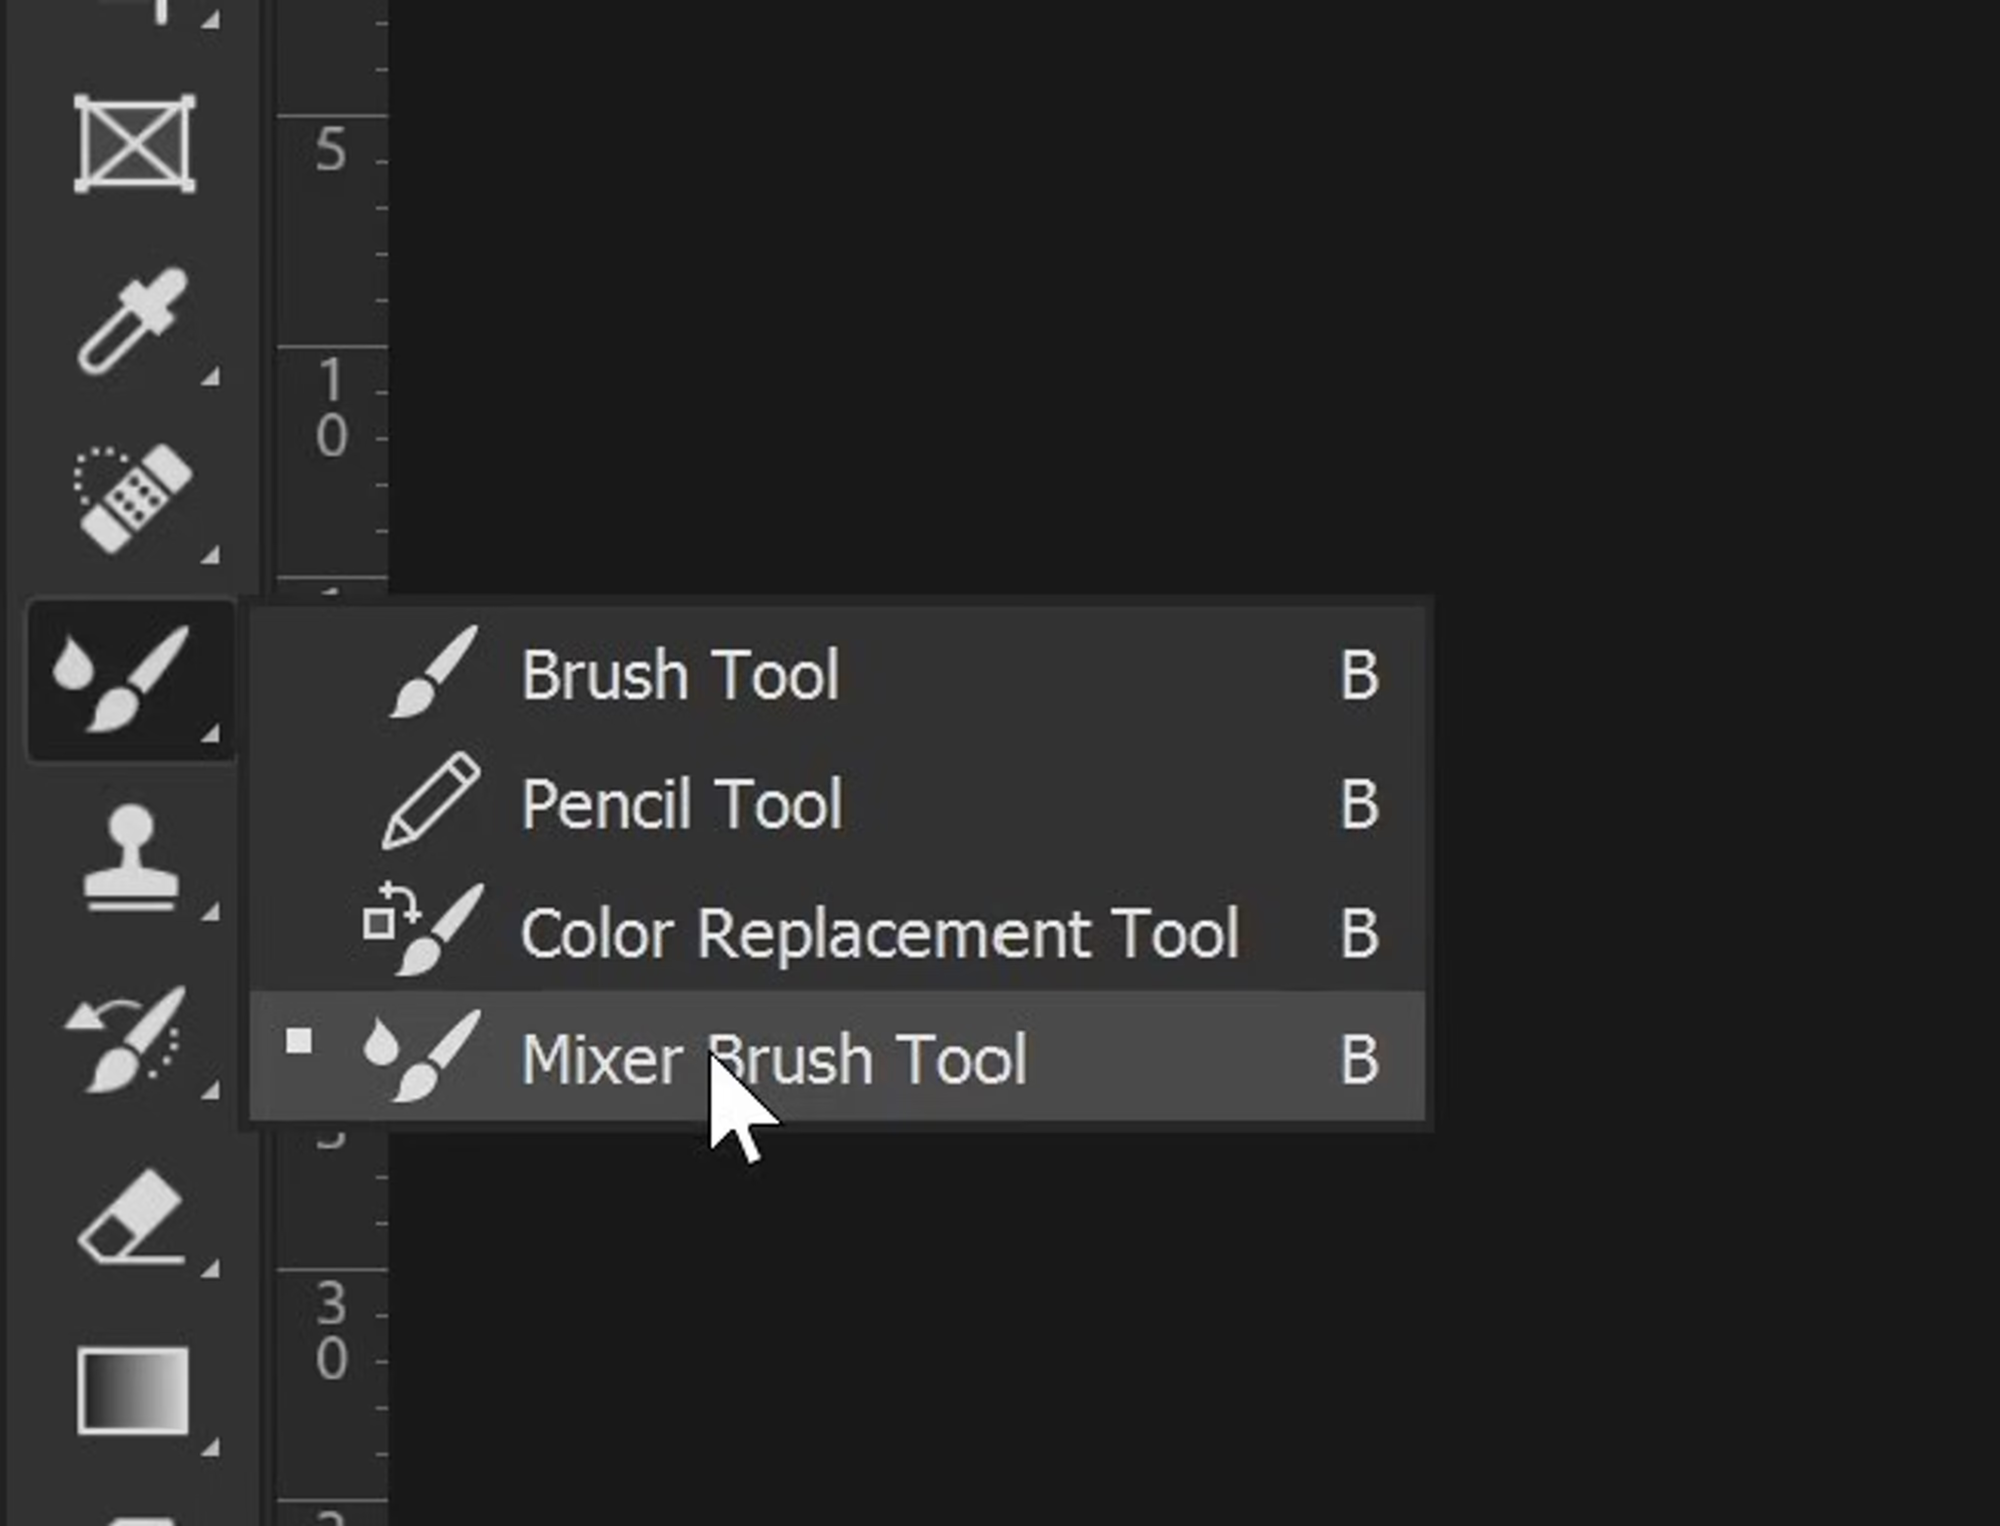
Sometimes we have to make Jewellery look extra smooth and the mix brush technique is the fastest method for achieving it. The mixer brush will remove all the texture. It will try to blend close colours.
Let us see how to apply this technique.
Create a blank new layer.
Select the mixer brush, which can be accessed by right-clicking on the brush tool.
You might need some training with Mixer Brush before moving further. But if you follow the settings mentioned, you will get close to the results.
First, enable the icon on the top bar that looks like a brush and a line.
Set Wet, Load, Mix, and Flow all to 20%.
Check Sample all layers on the top bar.
Now paint over your Jewellery in back and forth motion with a small hard brush.
The colours will start blending and remove any texture.
Control your strokes and repeat them over an area to change the look of the image.
If you stroke the brush in a straight line or a curve, the colours follow the brush and spread over that specific portion. A mixer brush is a very vital tool for retouchers. Make sure you master it. Now let us see a technique great for creating an authentic look.
Frequency separation splits your image into two parts, texture and colour. It gives the freedom to a retoucher to with a brush they can make whatever adjustment they want. It is a complex technique and takes the most time. Bear with me as I explain it.
An image is made of multiple frequencies. Higher frequencies where there is lots of variation in colours or the texture is present, the lower frequency with lesser variations.
Let us see how to apply it. Make sure you check the image you are working on is 8-bit. For a 16-bit image, on the 6th step change the Blend to Add and Offset to 0.
Duplicate your image twice.
Name the top one High and beneath it Low.
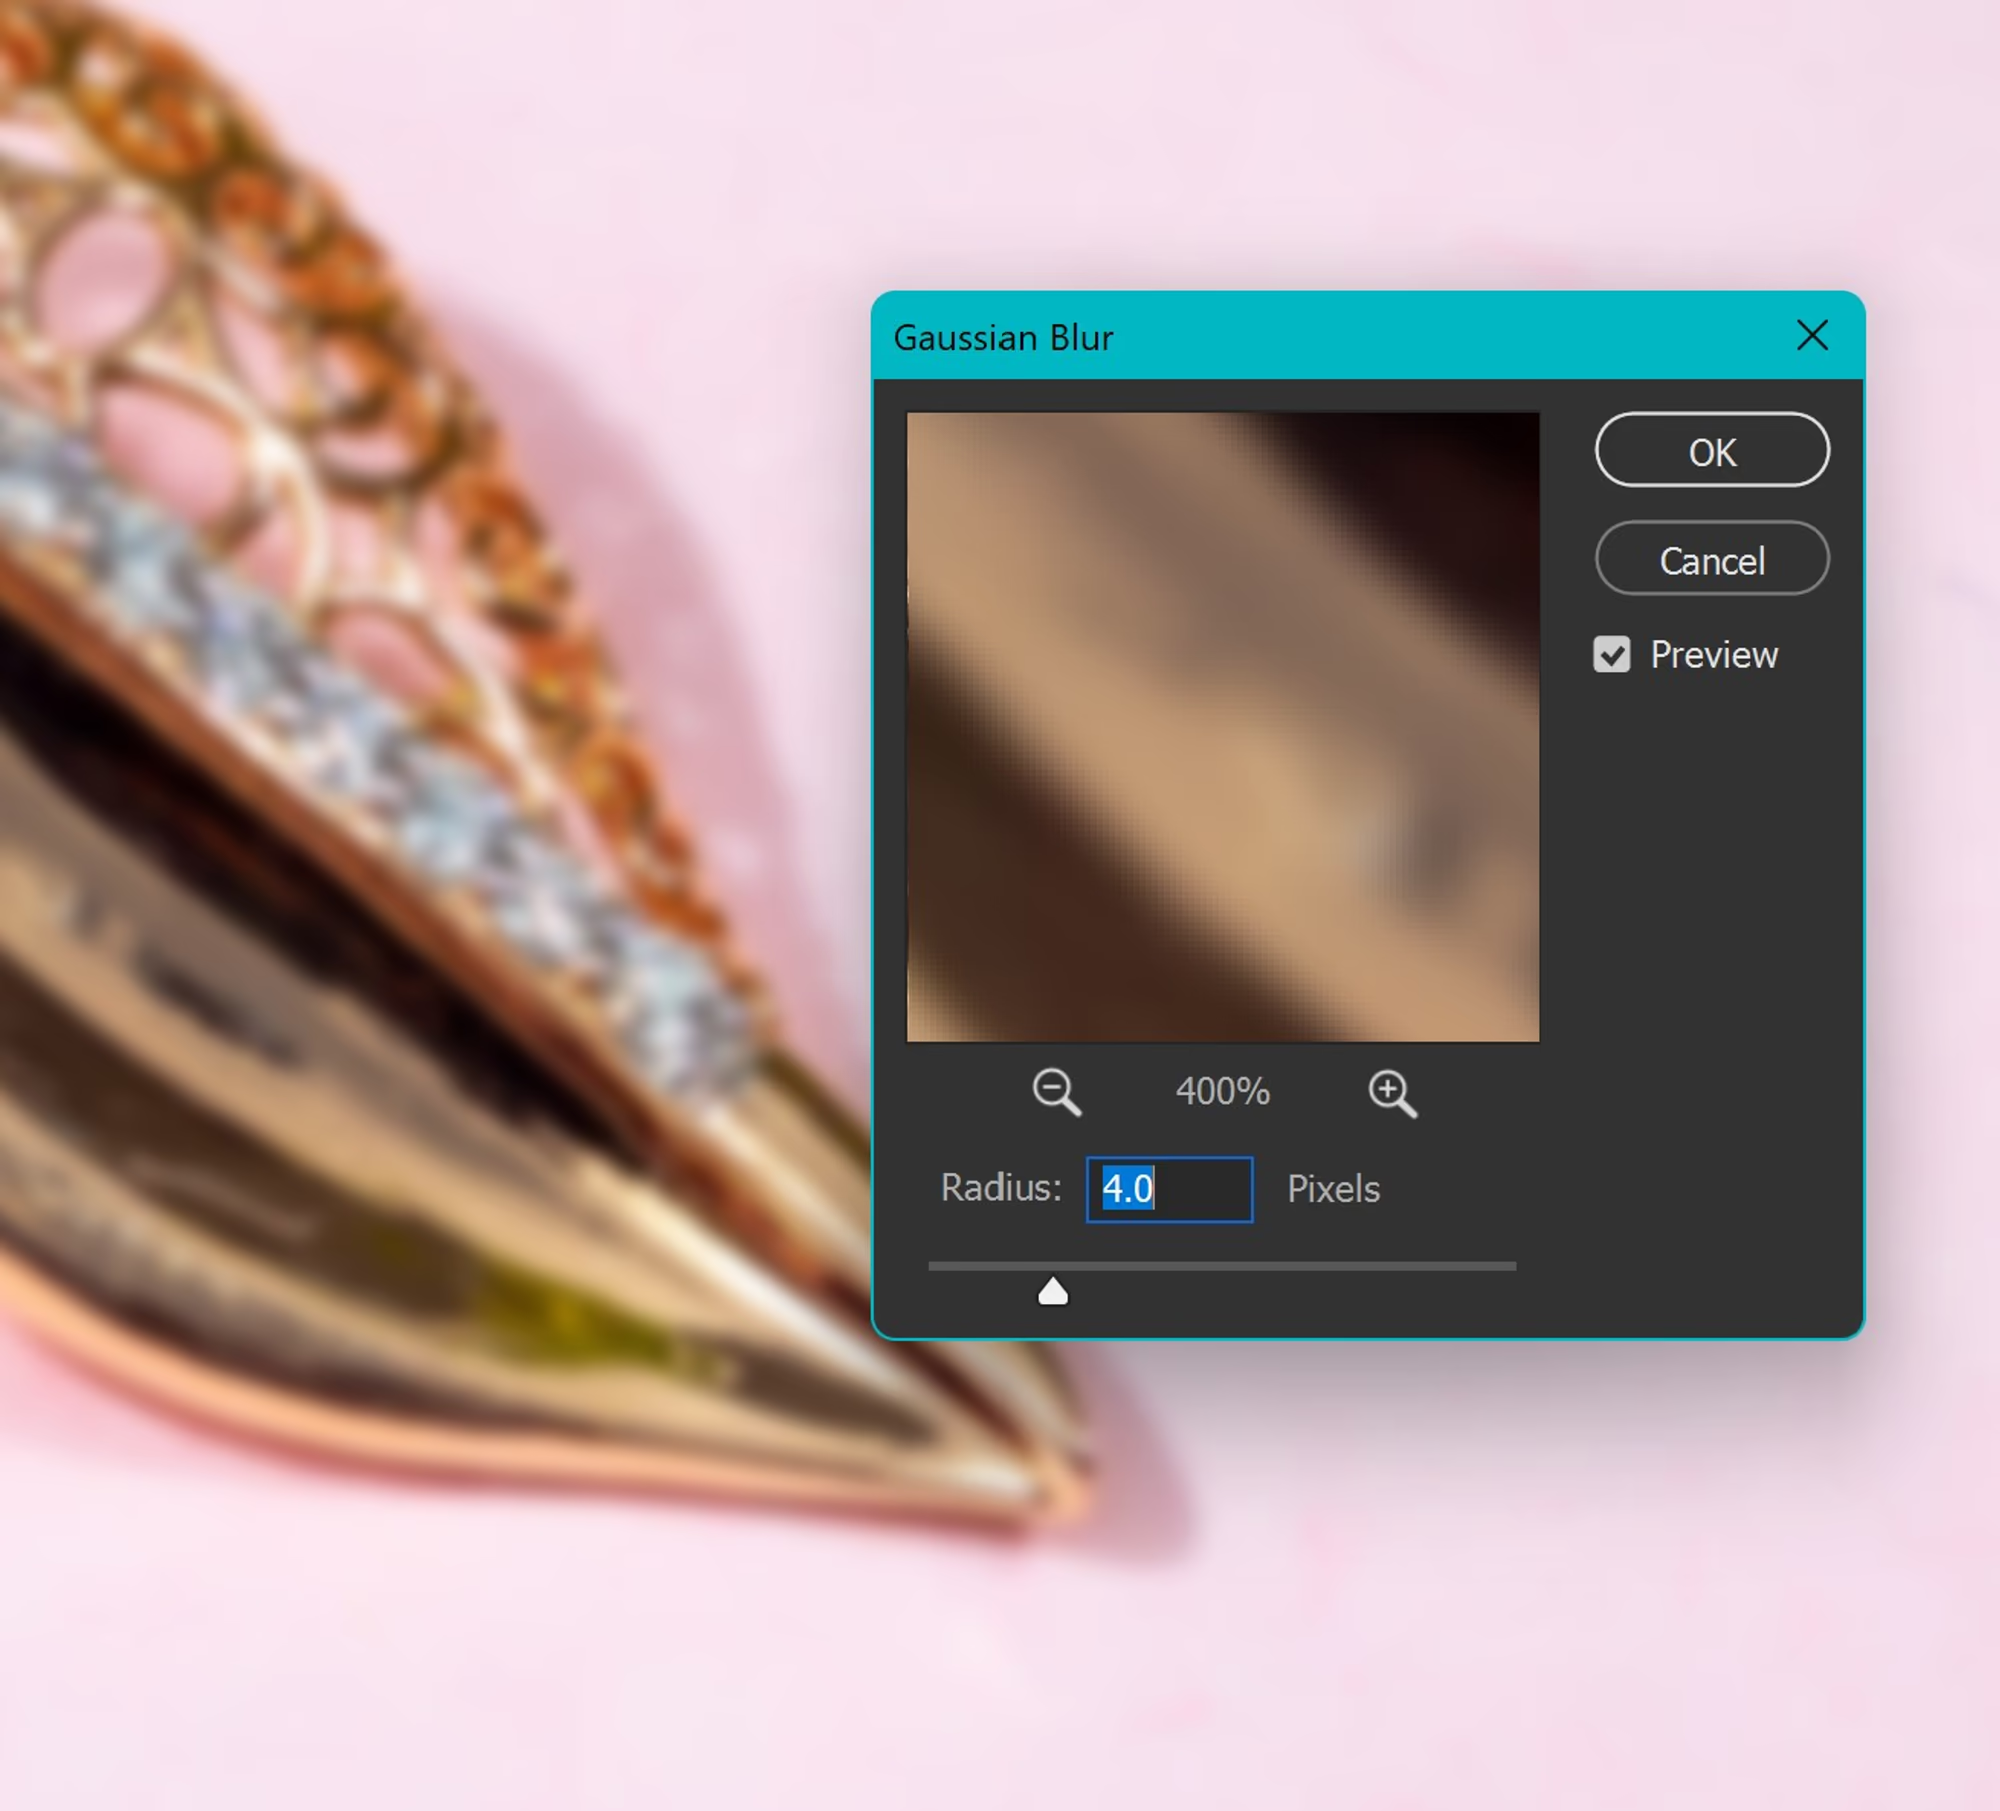
Hide the top layer and select the lower layer and apply gaussian blur to it. Select a radius between 3 and 15 that removes all the texture.
Gaussian Blur
Next, make the top layer visible and select it.
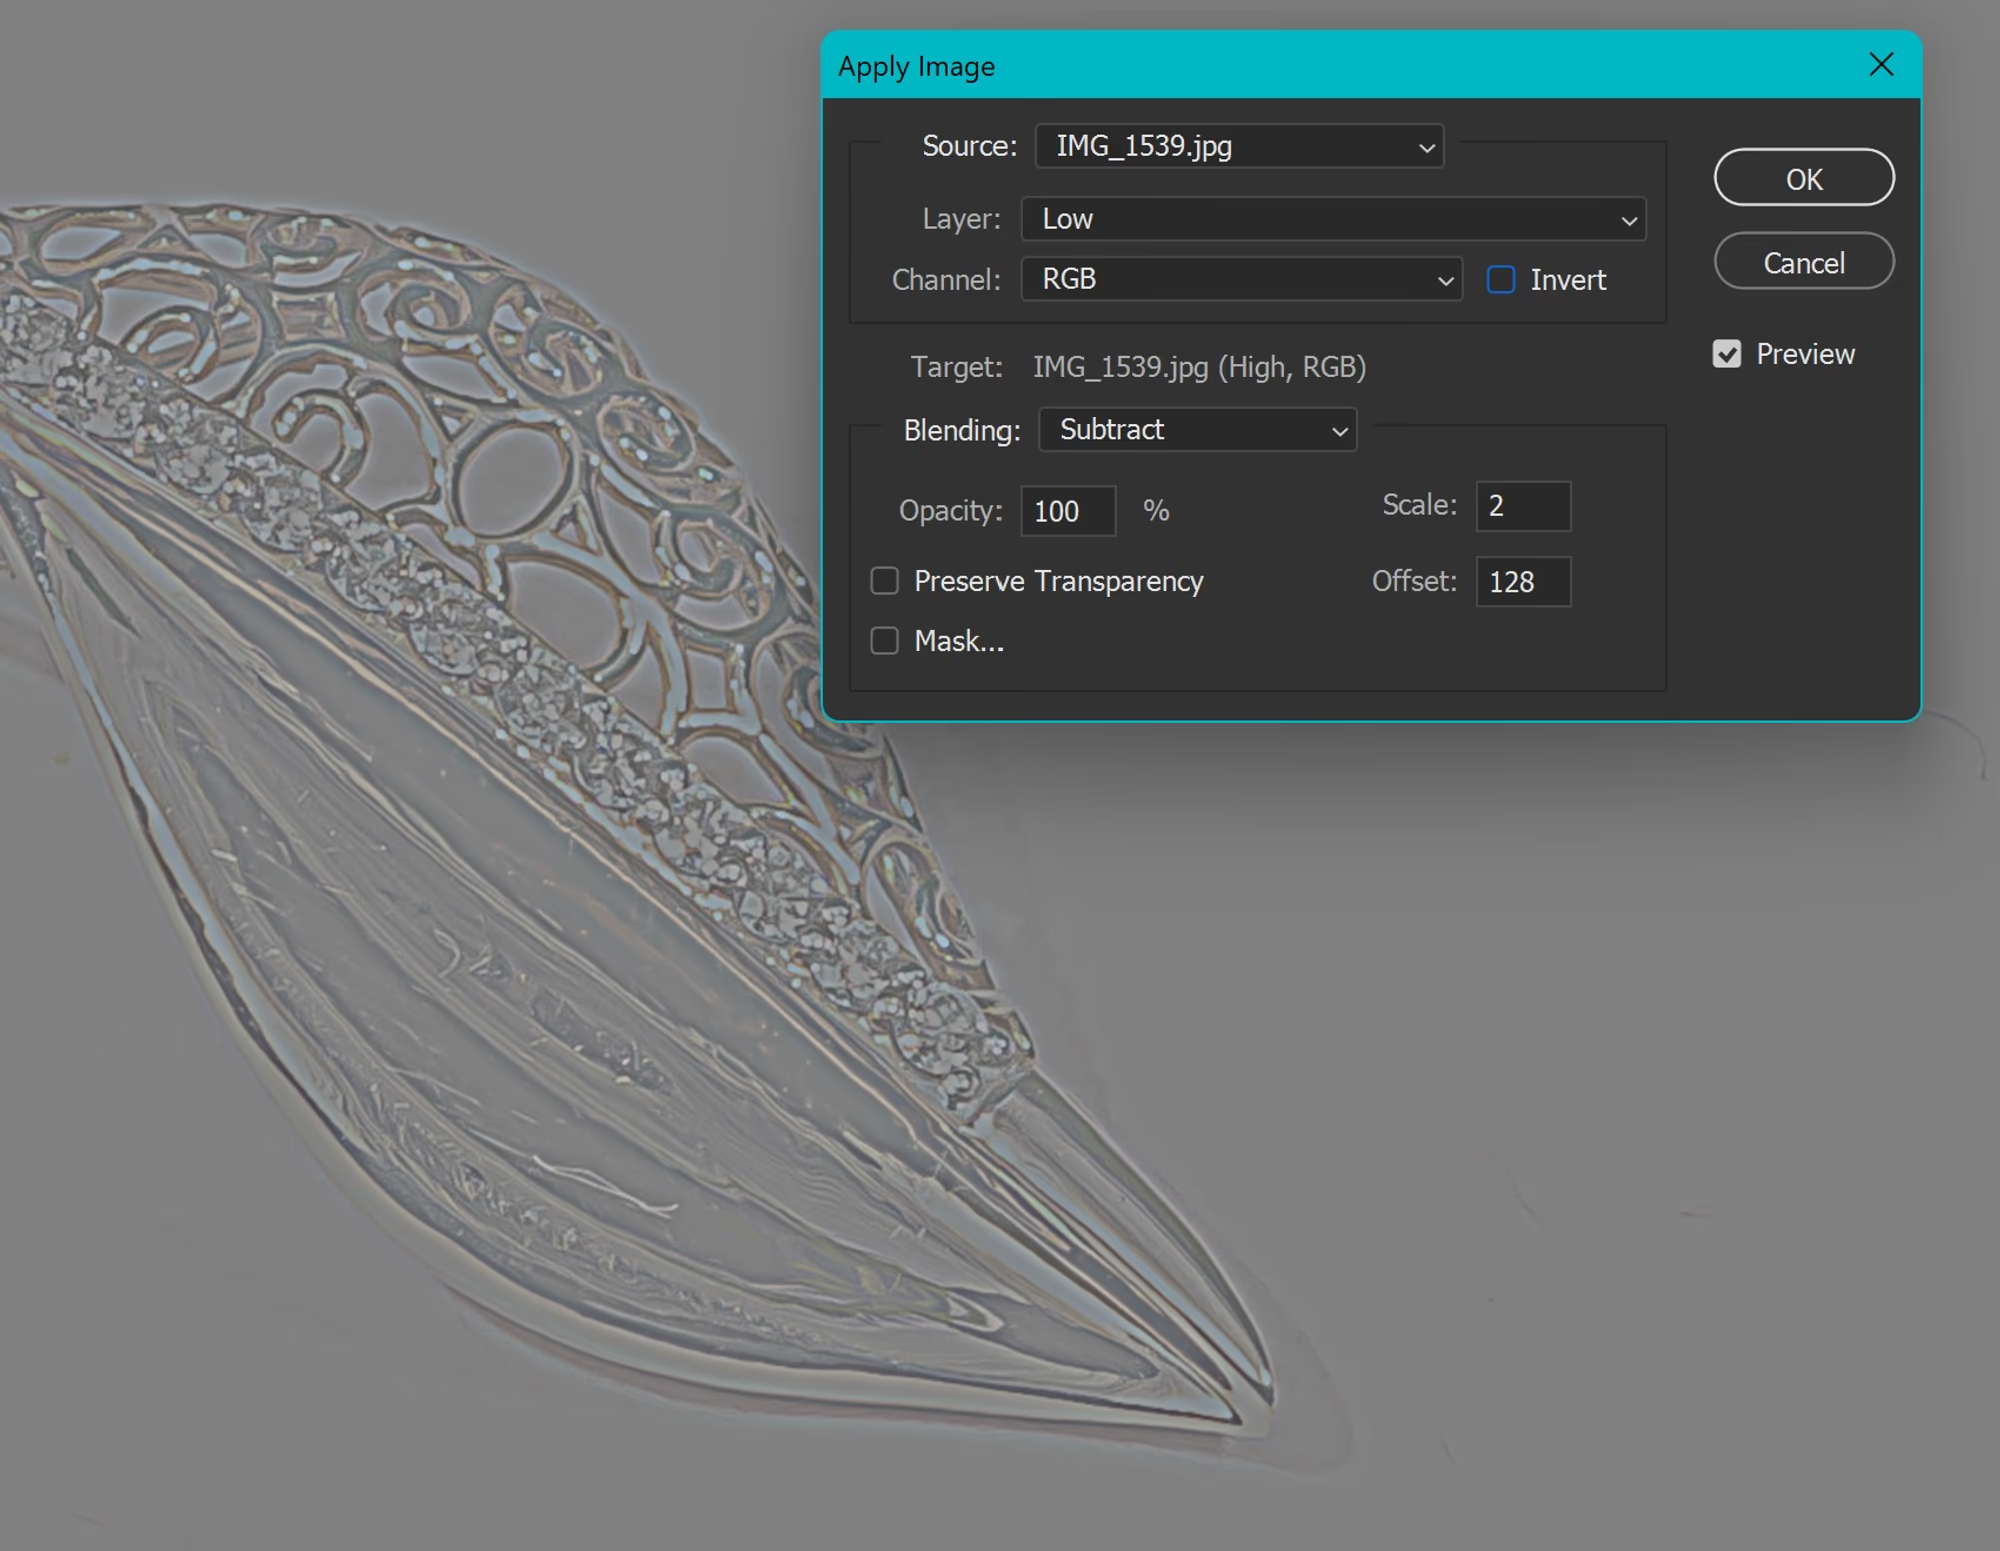
Then go to the image menu there and select Apply Image.
In Layer selection, select Low layer and Blend to Subtract.
Then Set Scale to 2 and Offset to 128 and click OK.
Apply Image
Next, set the top layer to Linear light and you will see magic. Your image is now divided into two layers.
Next, use the mixer brush with Sample all layers turned off on the lower layer to change or blend colours.
For the High layer, use the Stamp tool with samples set to the current layer.
Before After Frequency Separation
After you have learned these techniques, put them to use on actual images. They will enable you to tackle all kinds of issues and the best part about it is you will learn something new every time you do it. If you like this tutorial and want us to do more tutorials like these, make sure you follow us on instagramfebnikdotcom